Medicoz WordPress Theme
- Theme Name: Medicoz - Clinic & Pharmacy WordPress Theme
- Author: ThemeChampion
- Author URI: www.themechampion.com
- Type: WordPress Theme
Introduction
First of all, Thank you so much for purchased our item. We really appreciate it and hope you enjoy it!
If you have any questions that are beyond the scope of this help file, feel free to raise a ticket at https://support.themechampion.com. We will do our best to answer you in shortest of time (24-48 hours usually). Before contacting support, please make sure you have followed the setup guide as there may already exist the answer to your question there.
To download the theme, login to your ThemeForest account and go to ThemeForest download page. Locate to the theme you had purchased (our theme) and then download (installable WordPress file only) it. After download, unzip the file and you will find (themename).zip file, this is main theme file to be installed.
Theme Requirements
Before beginning the installation and configuring of your new theme, you must first have WordPress with latest version already installed on a server. Your hosting must be running WordPress 4.4 or above, PHP 5.6 or above, and MySQL 5 or above and make sure that server must have full permission and sufficient memory.
To increase the PHP limits and memory. You can do this on your own using cpanel, or contact your hosting provider to increase those limits to a minimum as follows:
upload_max_filesize (256M)
max_input_time (300)
memory_limit (256M)
max_execution_time (300)
post_max_size (512M)
For more info: https://www.youtube.com/watch?v=Zm6etG9Bhh8
Theme Installation
Please install fresh/new WordPress on your server and login to its admin panel.
- 1. FTP Upload. Unzip the downloaded package and upload it to / your WordPress themes directory /wp-content/themes. folder of your installation. Useful article how to use FTP to install new theme.
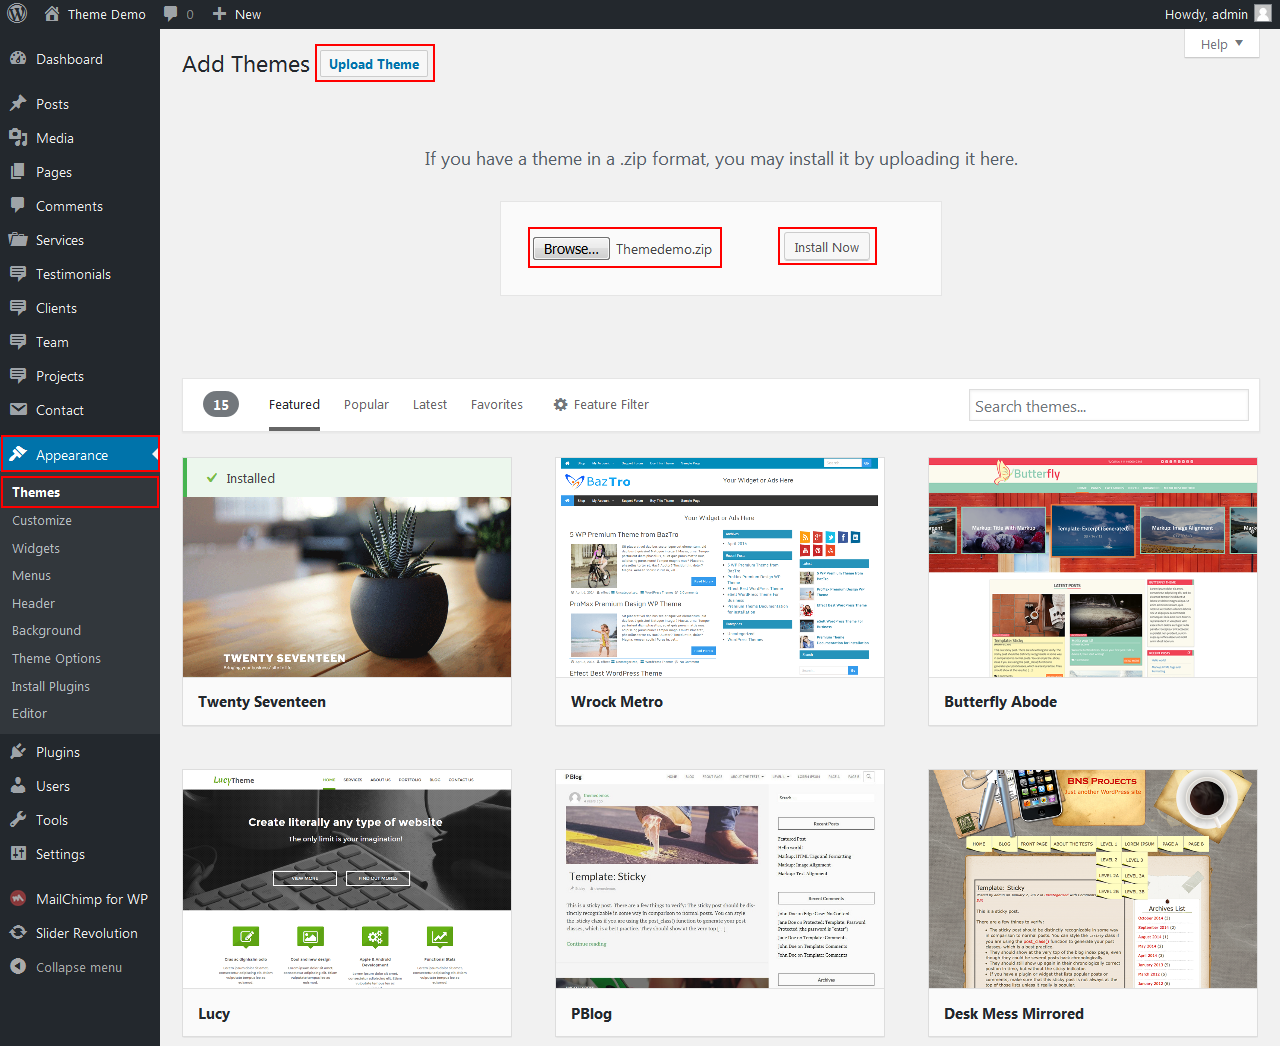
- 2. WordPress Upload. This is the easier way for most. Simply navigate to Appearance › Add New › Upload Theme. Click the “Browse” button and locate the still zipped theme folder. The theme will be uploaded and installed in a matter of seconds
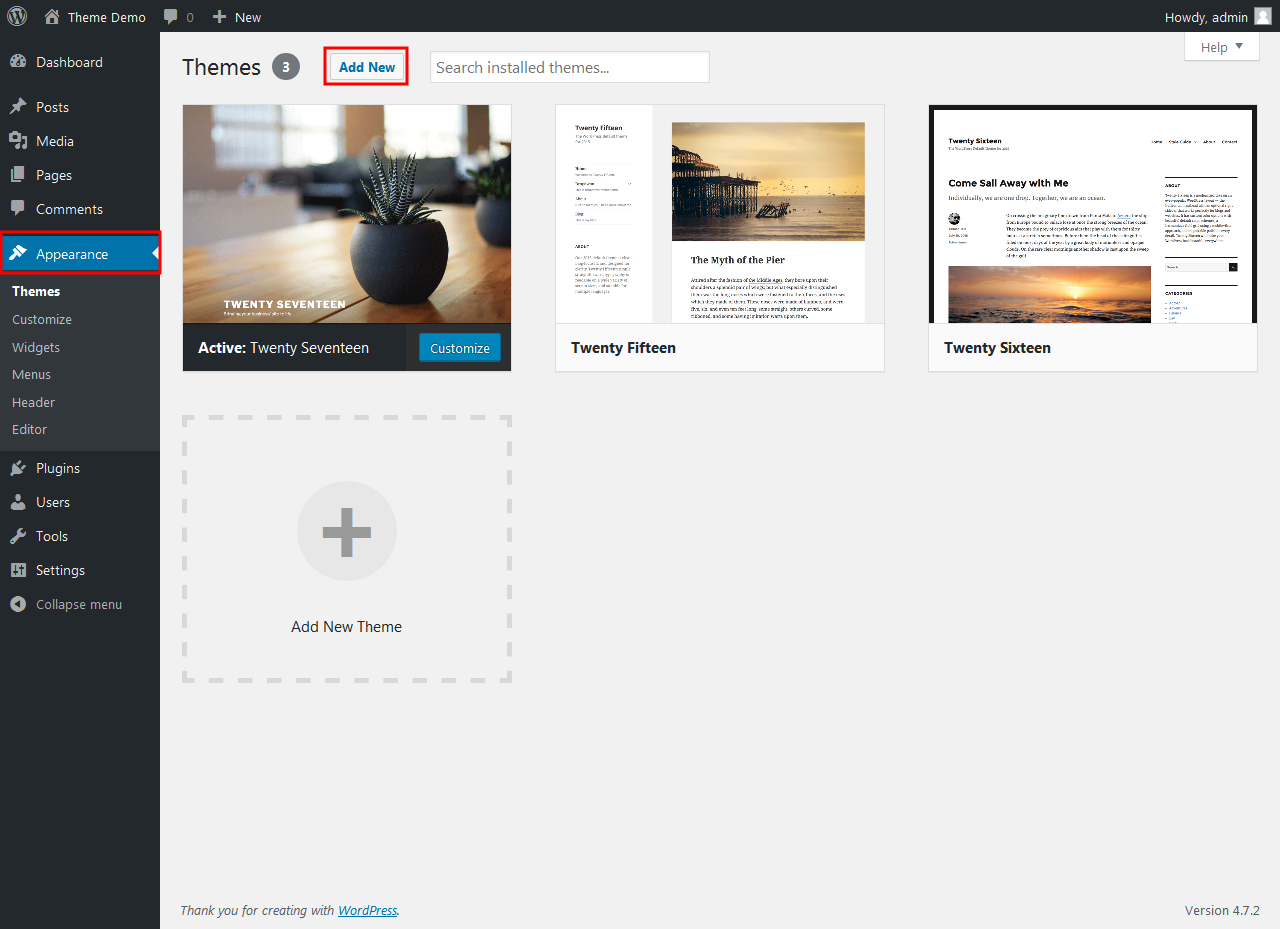
Step 1: Go to Appearance -> Themes then click to Add New
Step 2: Upload your downloaded 'medicoz' theme file, and then click on Install Now
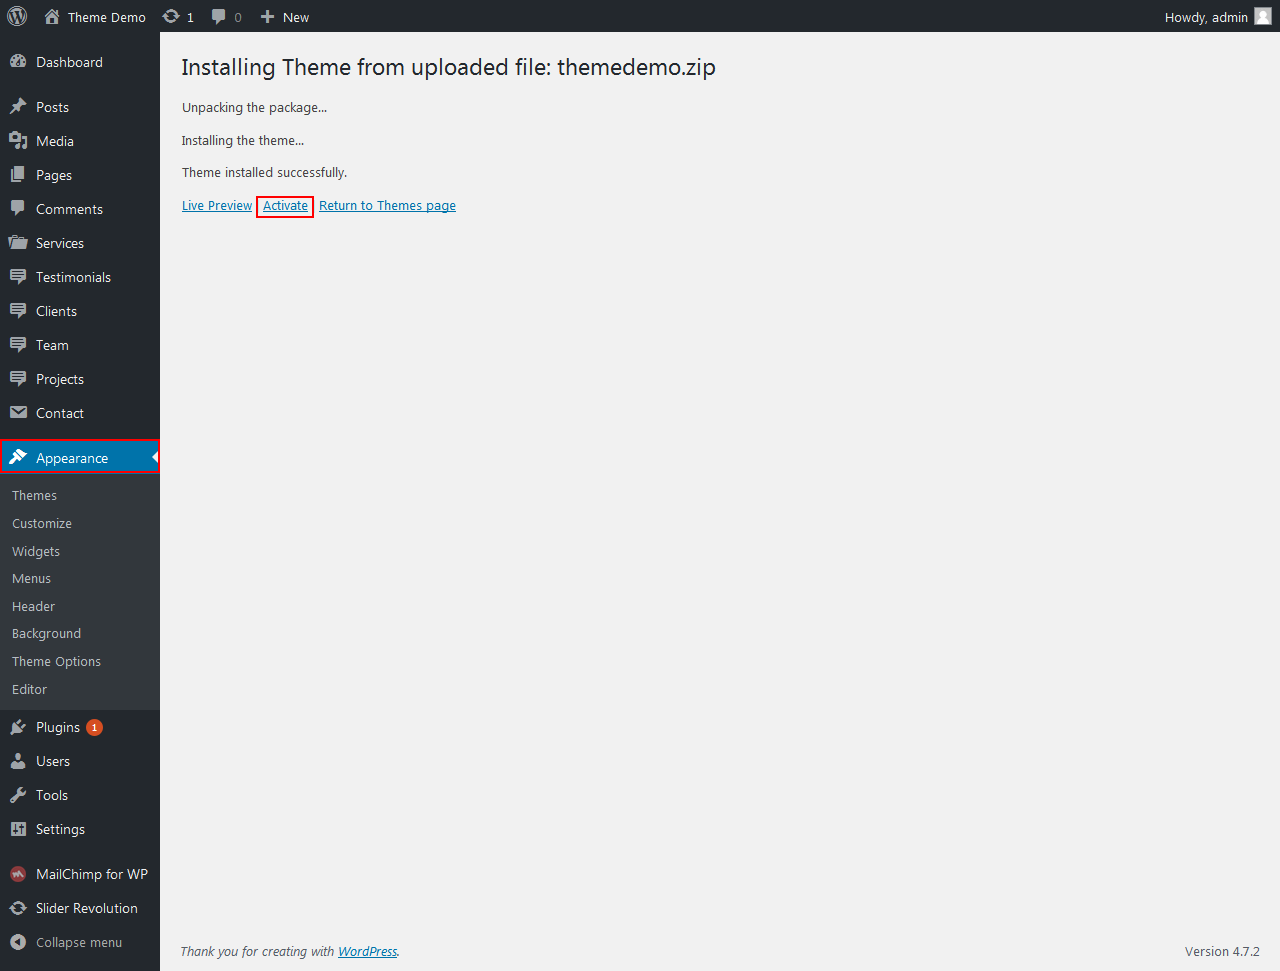
Step 3: After the installation progress completed, click Activate to activate your theme.
Activate Theme And Plugins
1. Activate your theme copy by entering your Purchase Code.
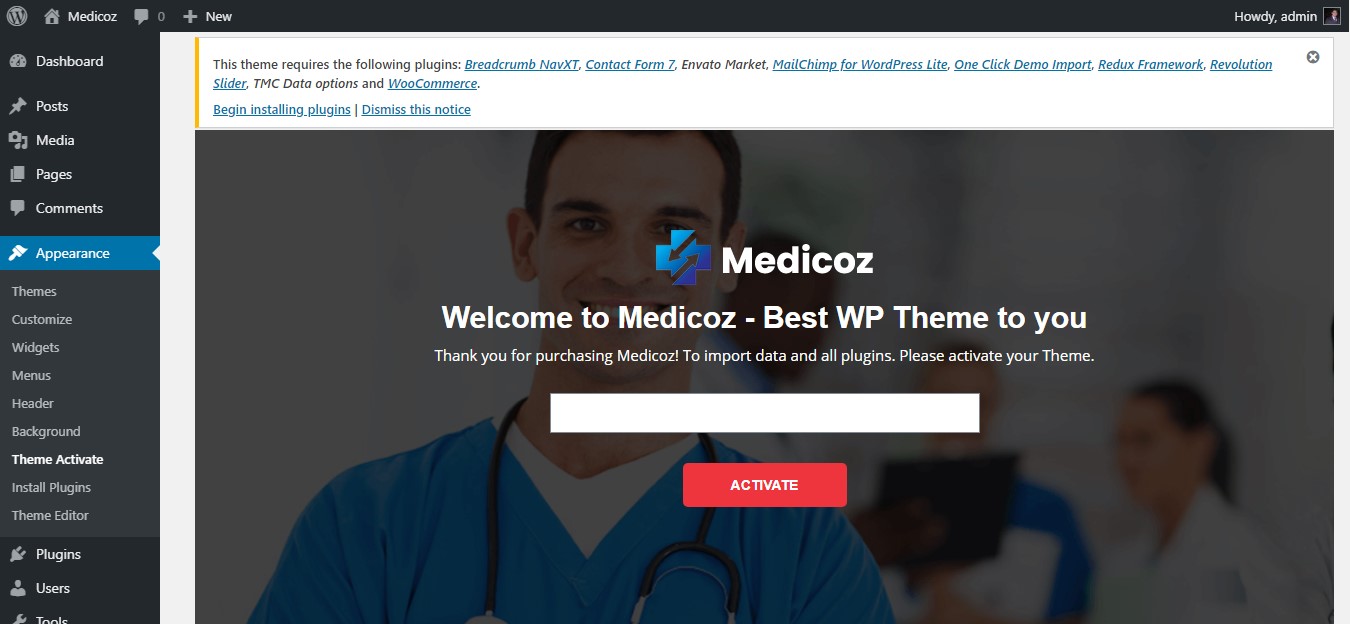
2. Once you enter correct purchase code and activate theme, you are ready to install the plugins and import data.
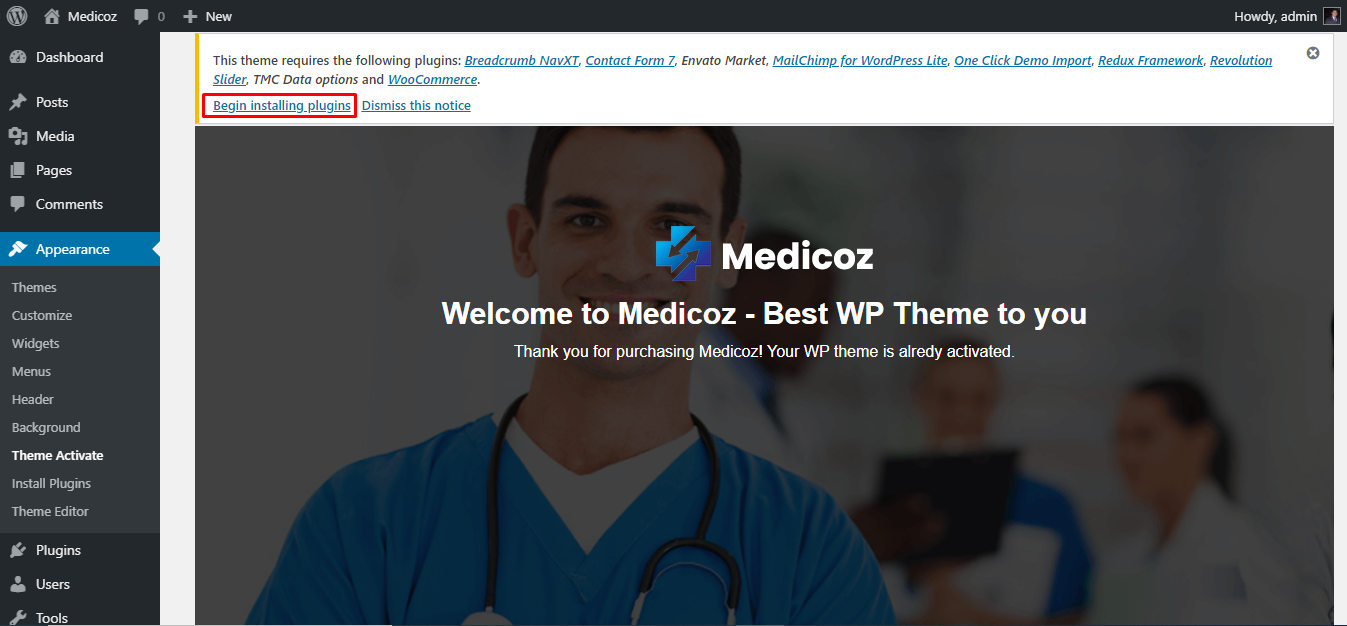
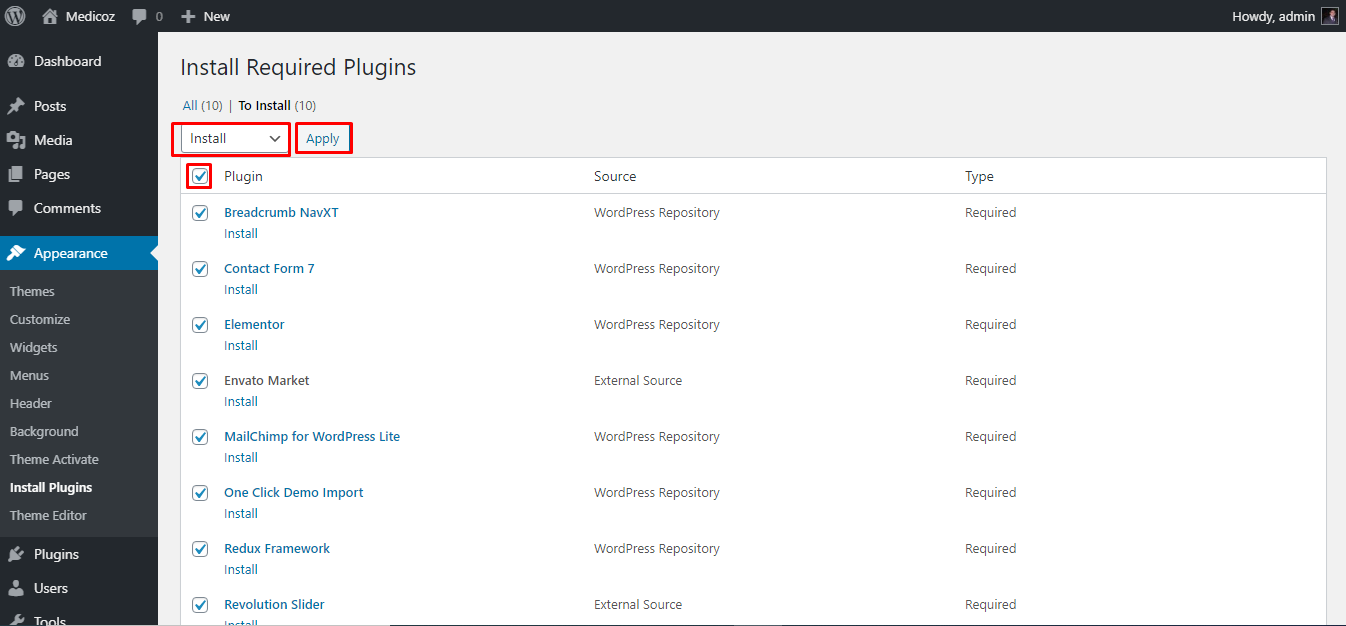
3. Next, check boxes to select all the plugins, select the bulk action of install from the dropdown box and then click the button to apply.
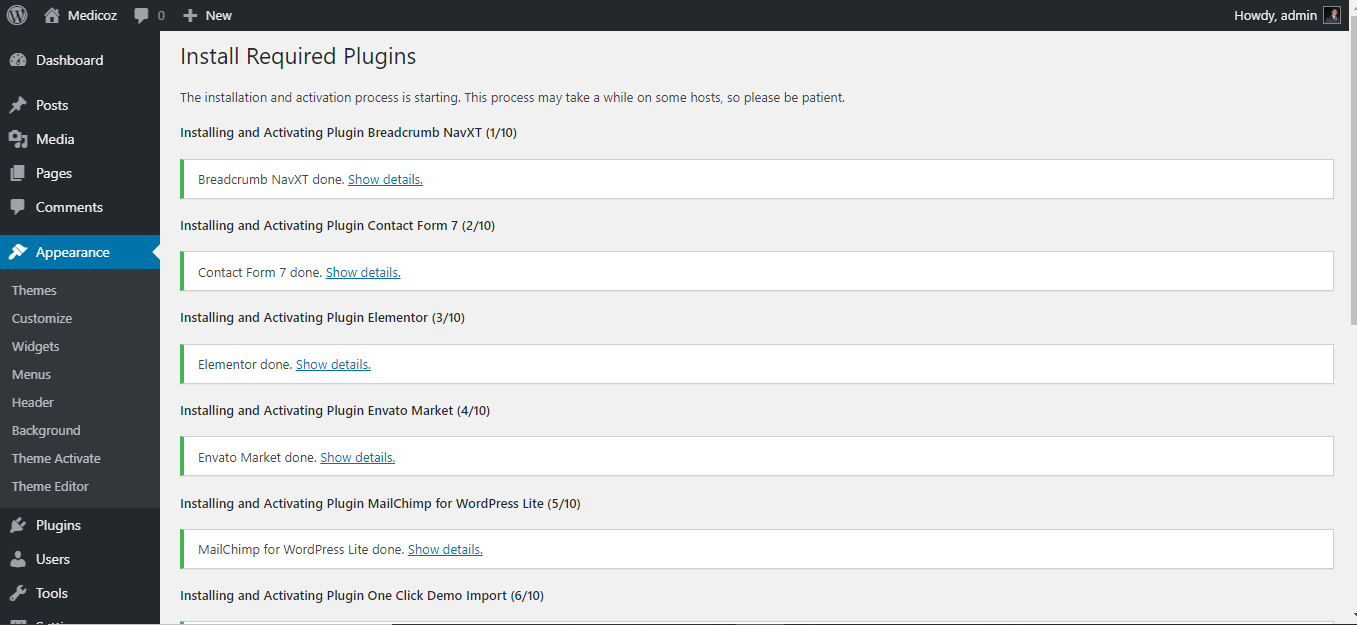
4. Finally, you will got a confirmation notice that your plugins are activated.
One click Demo Importer
This theme offer One click demo data import solution. Go to Admin -> Appearance -> Import Demo Data and click on the button Import Demo Data.
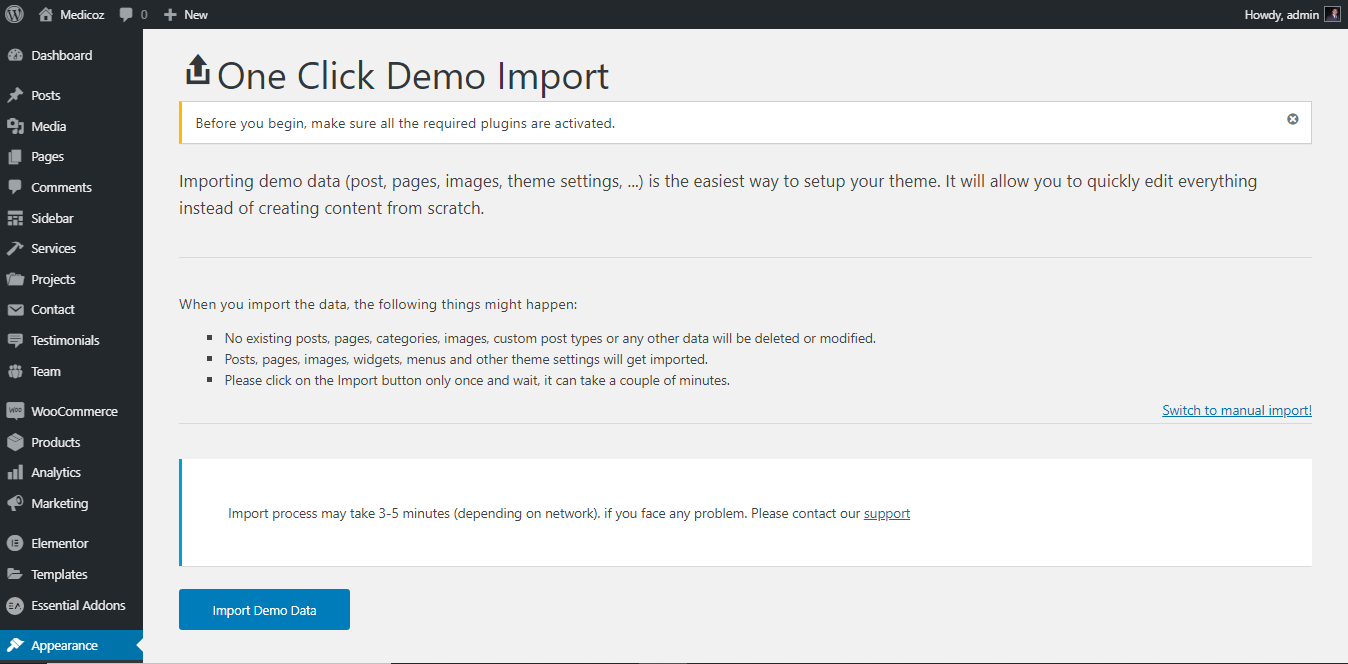
Importing can take a couple of minutes depending on the network, you should see a success confirmation when the importing is completed.
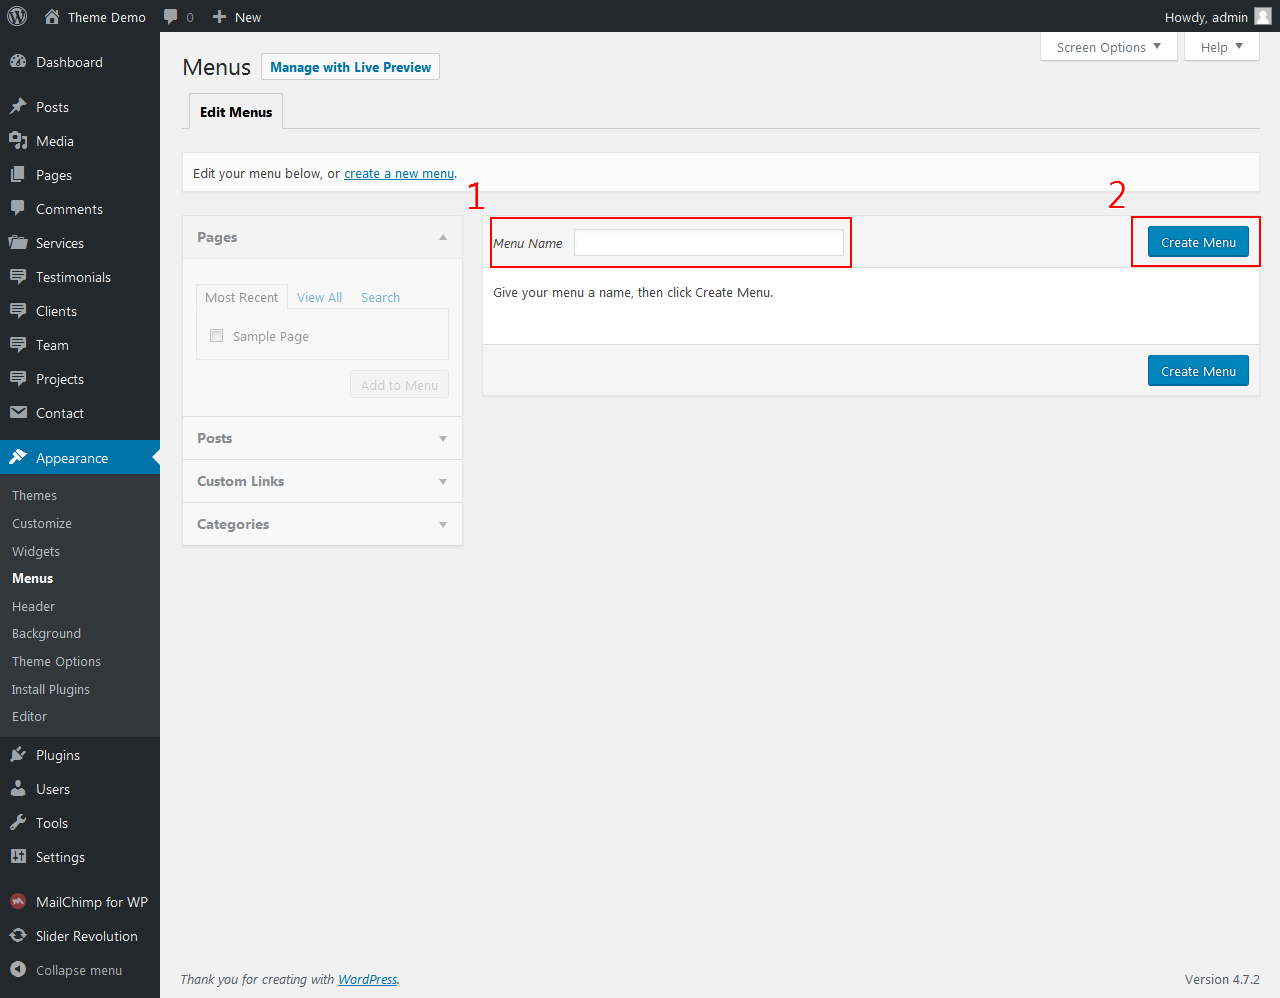
Navigation
Step 1: Go to Appearance > Menu, enter your navigation name and click to Create Menu.
Step 2: Create new menu,Choose item from the left to menu area and Save.
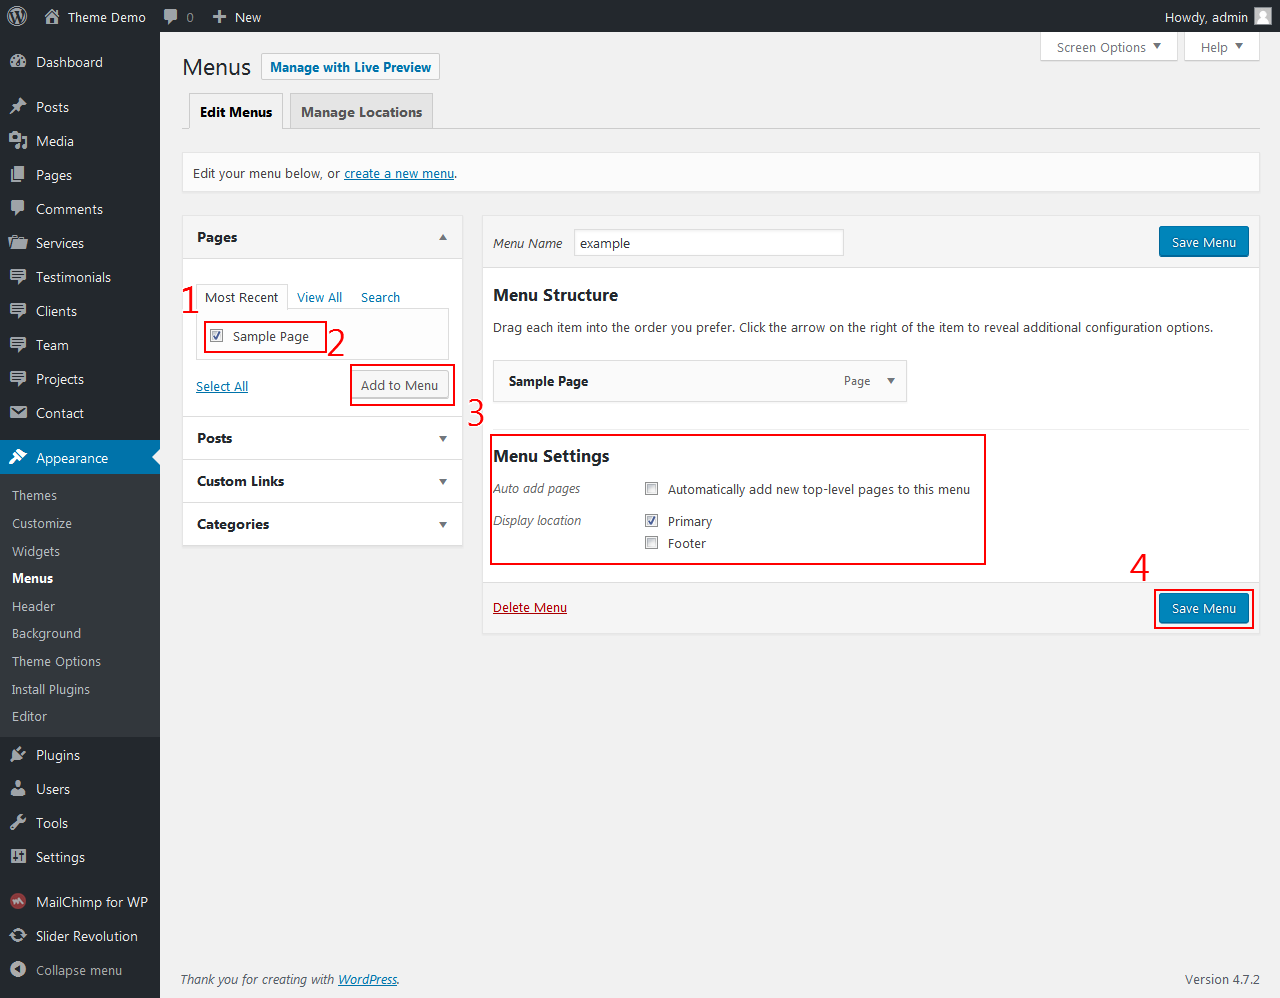
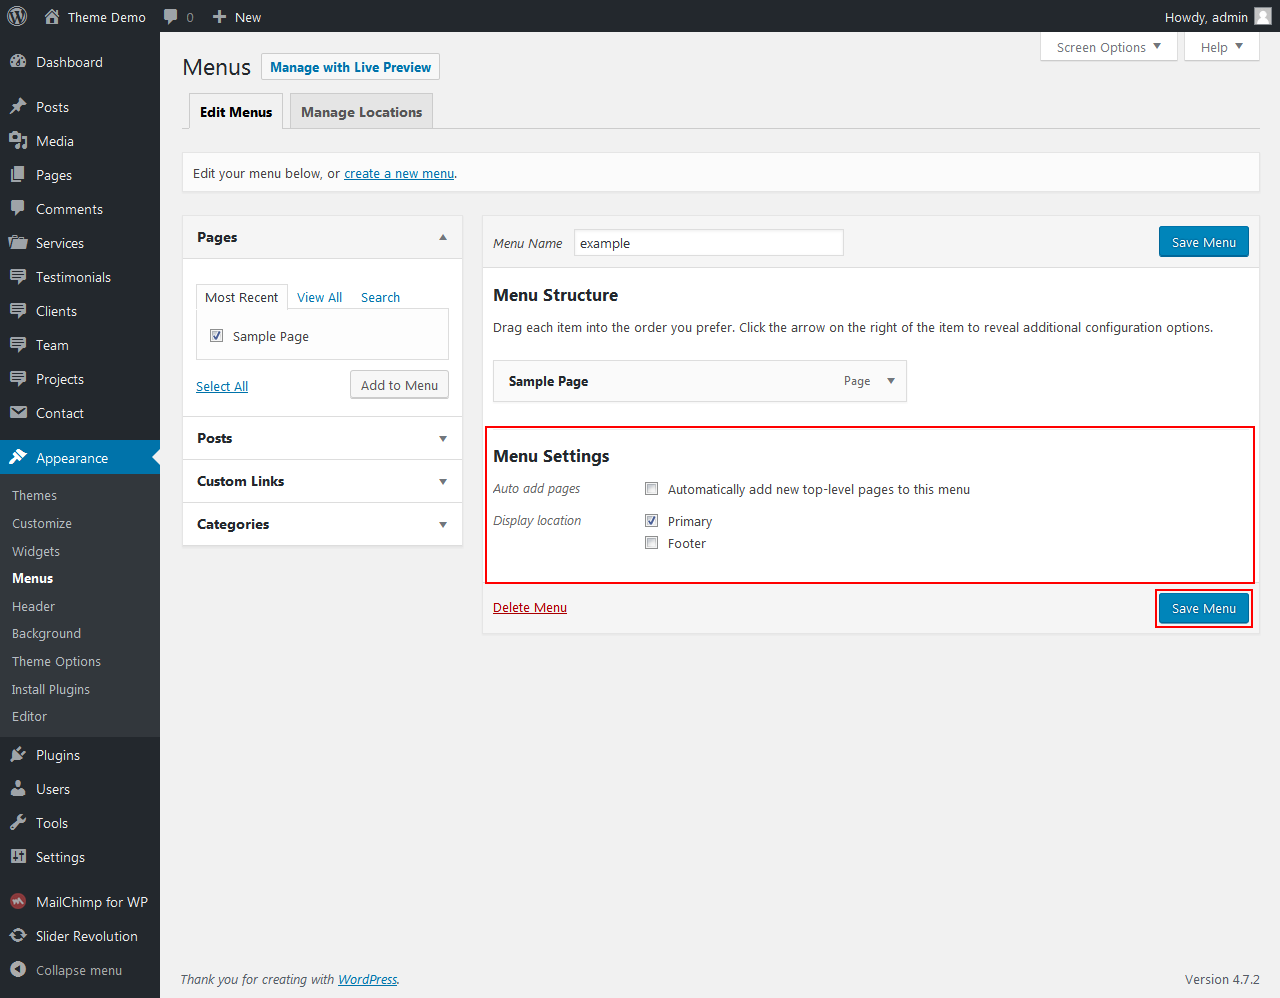
The theme offer two Menu locations: Primary and Footer
Add your custom menu, drag any link/page/post to it and set menu location for it.
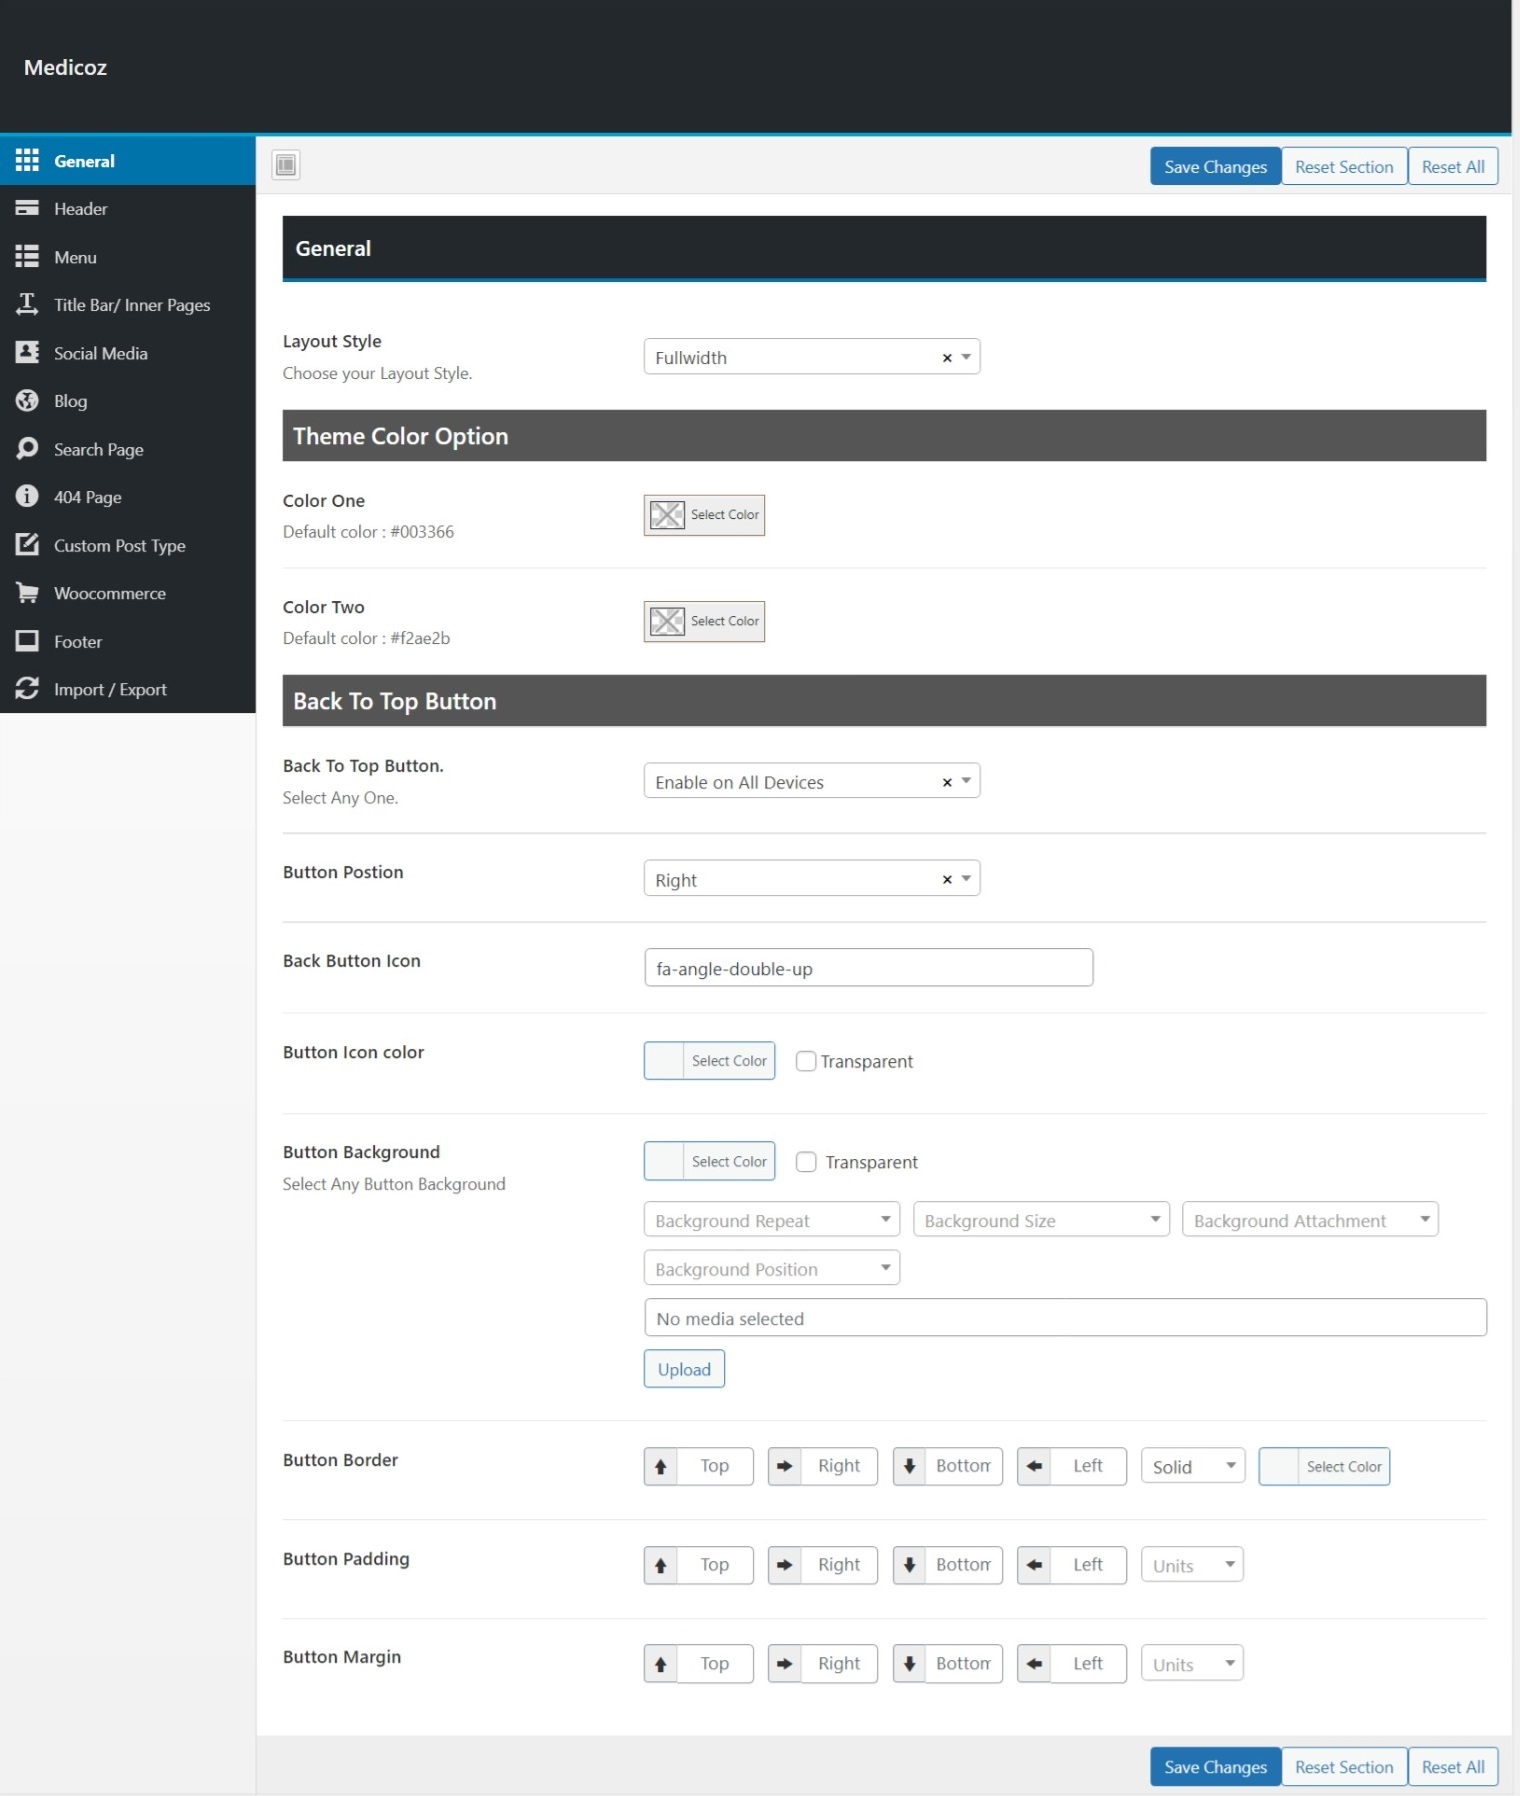
Theme Options
Theme options is a custom admin page to all of the theme's extensive configuration options. It allows users to change theme settings without modifying theme files or touching any code. To view the panel, navigate to the Theme Options in the left-hand menu. Here you have the ability to alter many core aspects that make up how your theme looks and behaves.
General
To change General Settings. Go to Theme Options > General
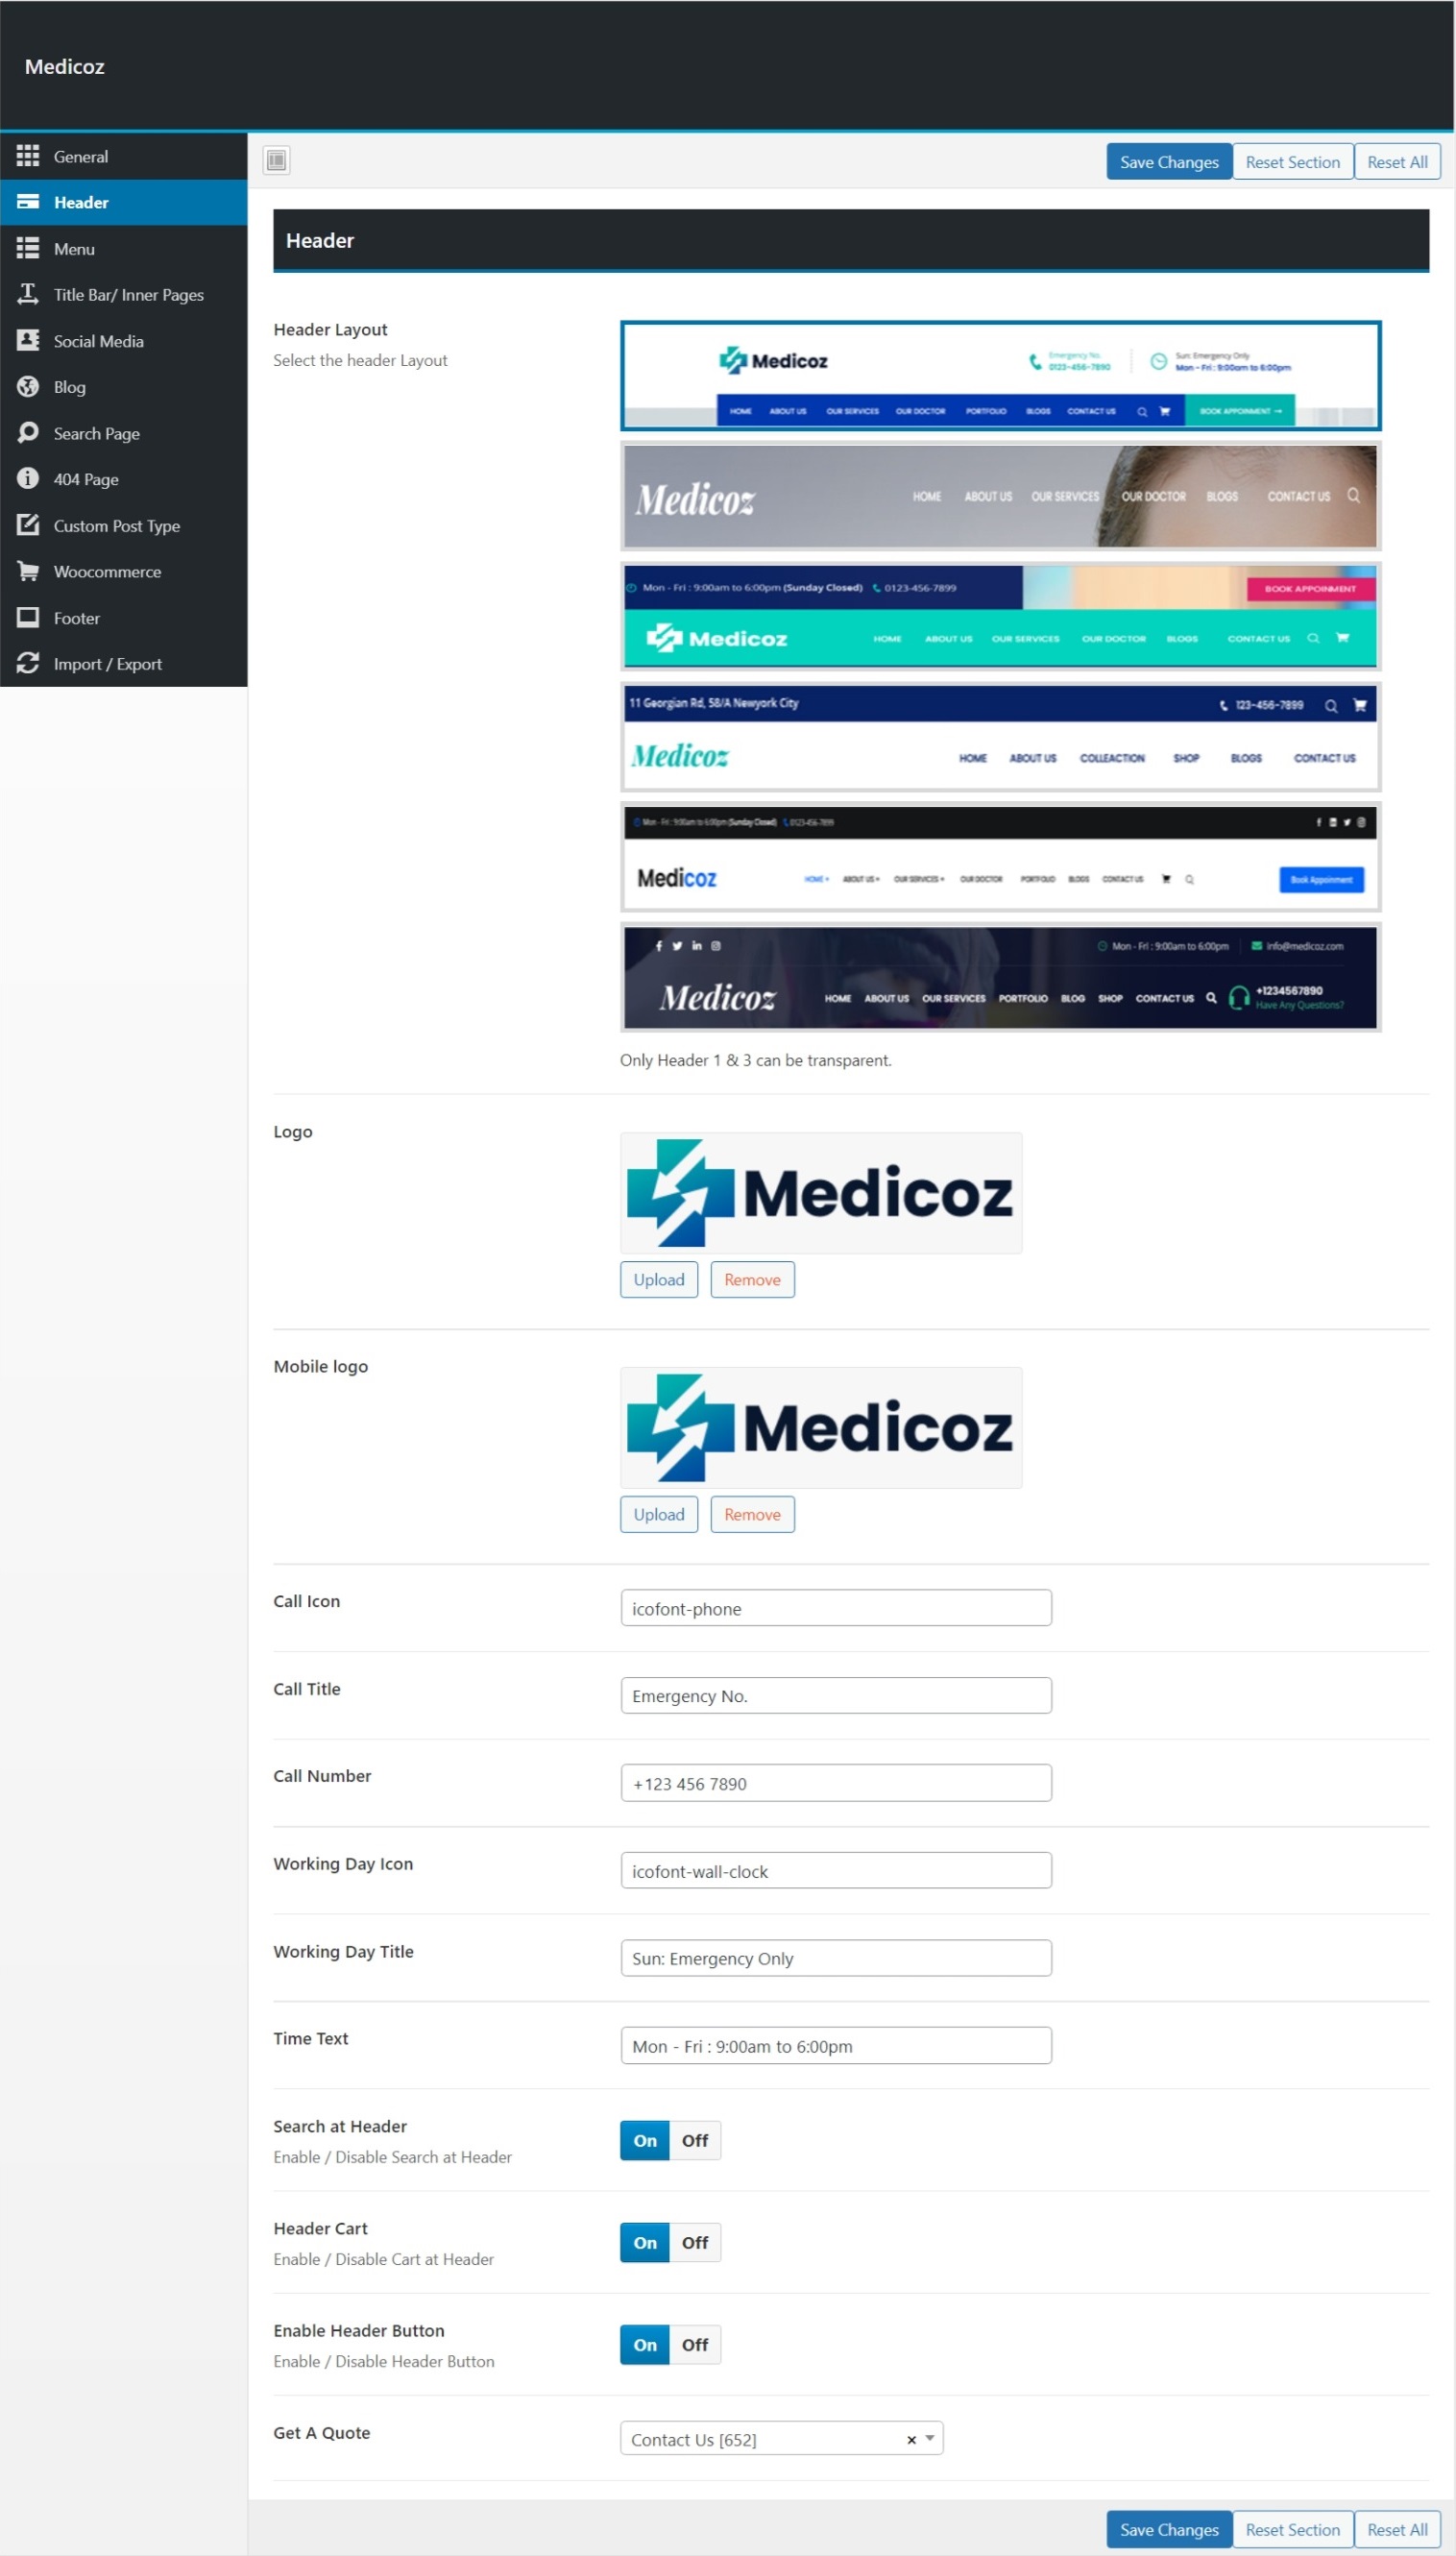
Header
To change Header of your choice. Go to Theme Options > Headers
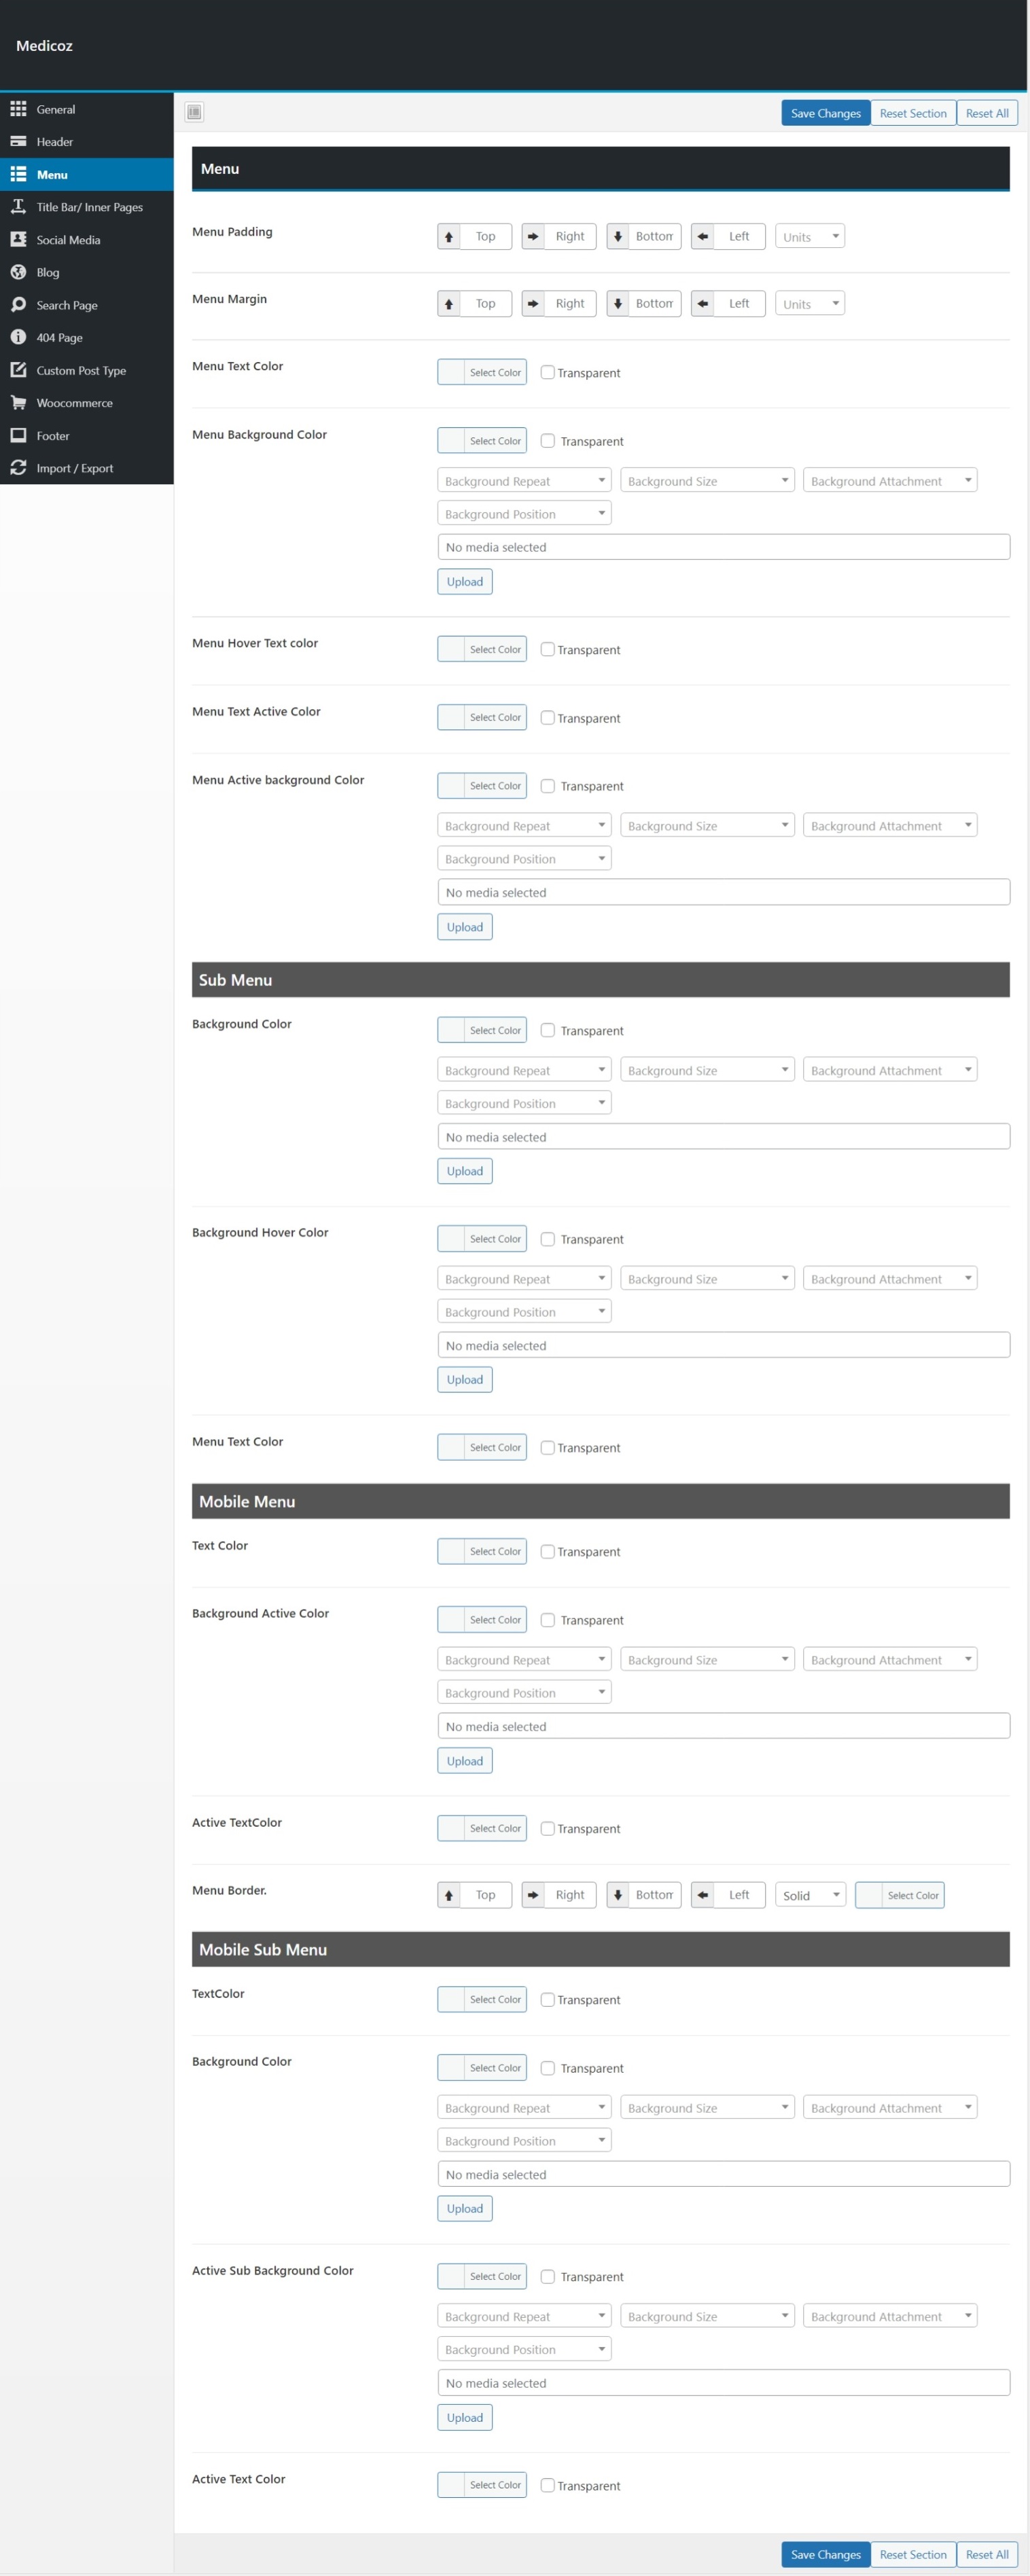
Menus
To change menu settings. Go to Theme Options > Menu
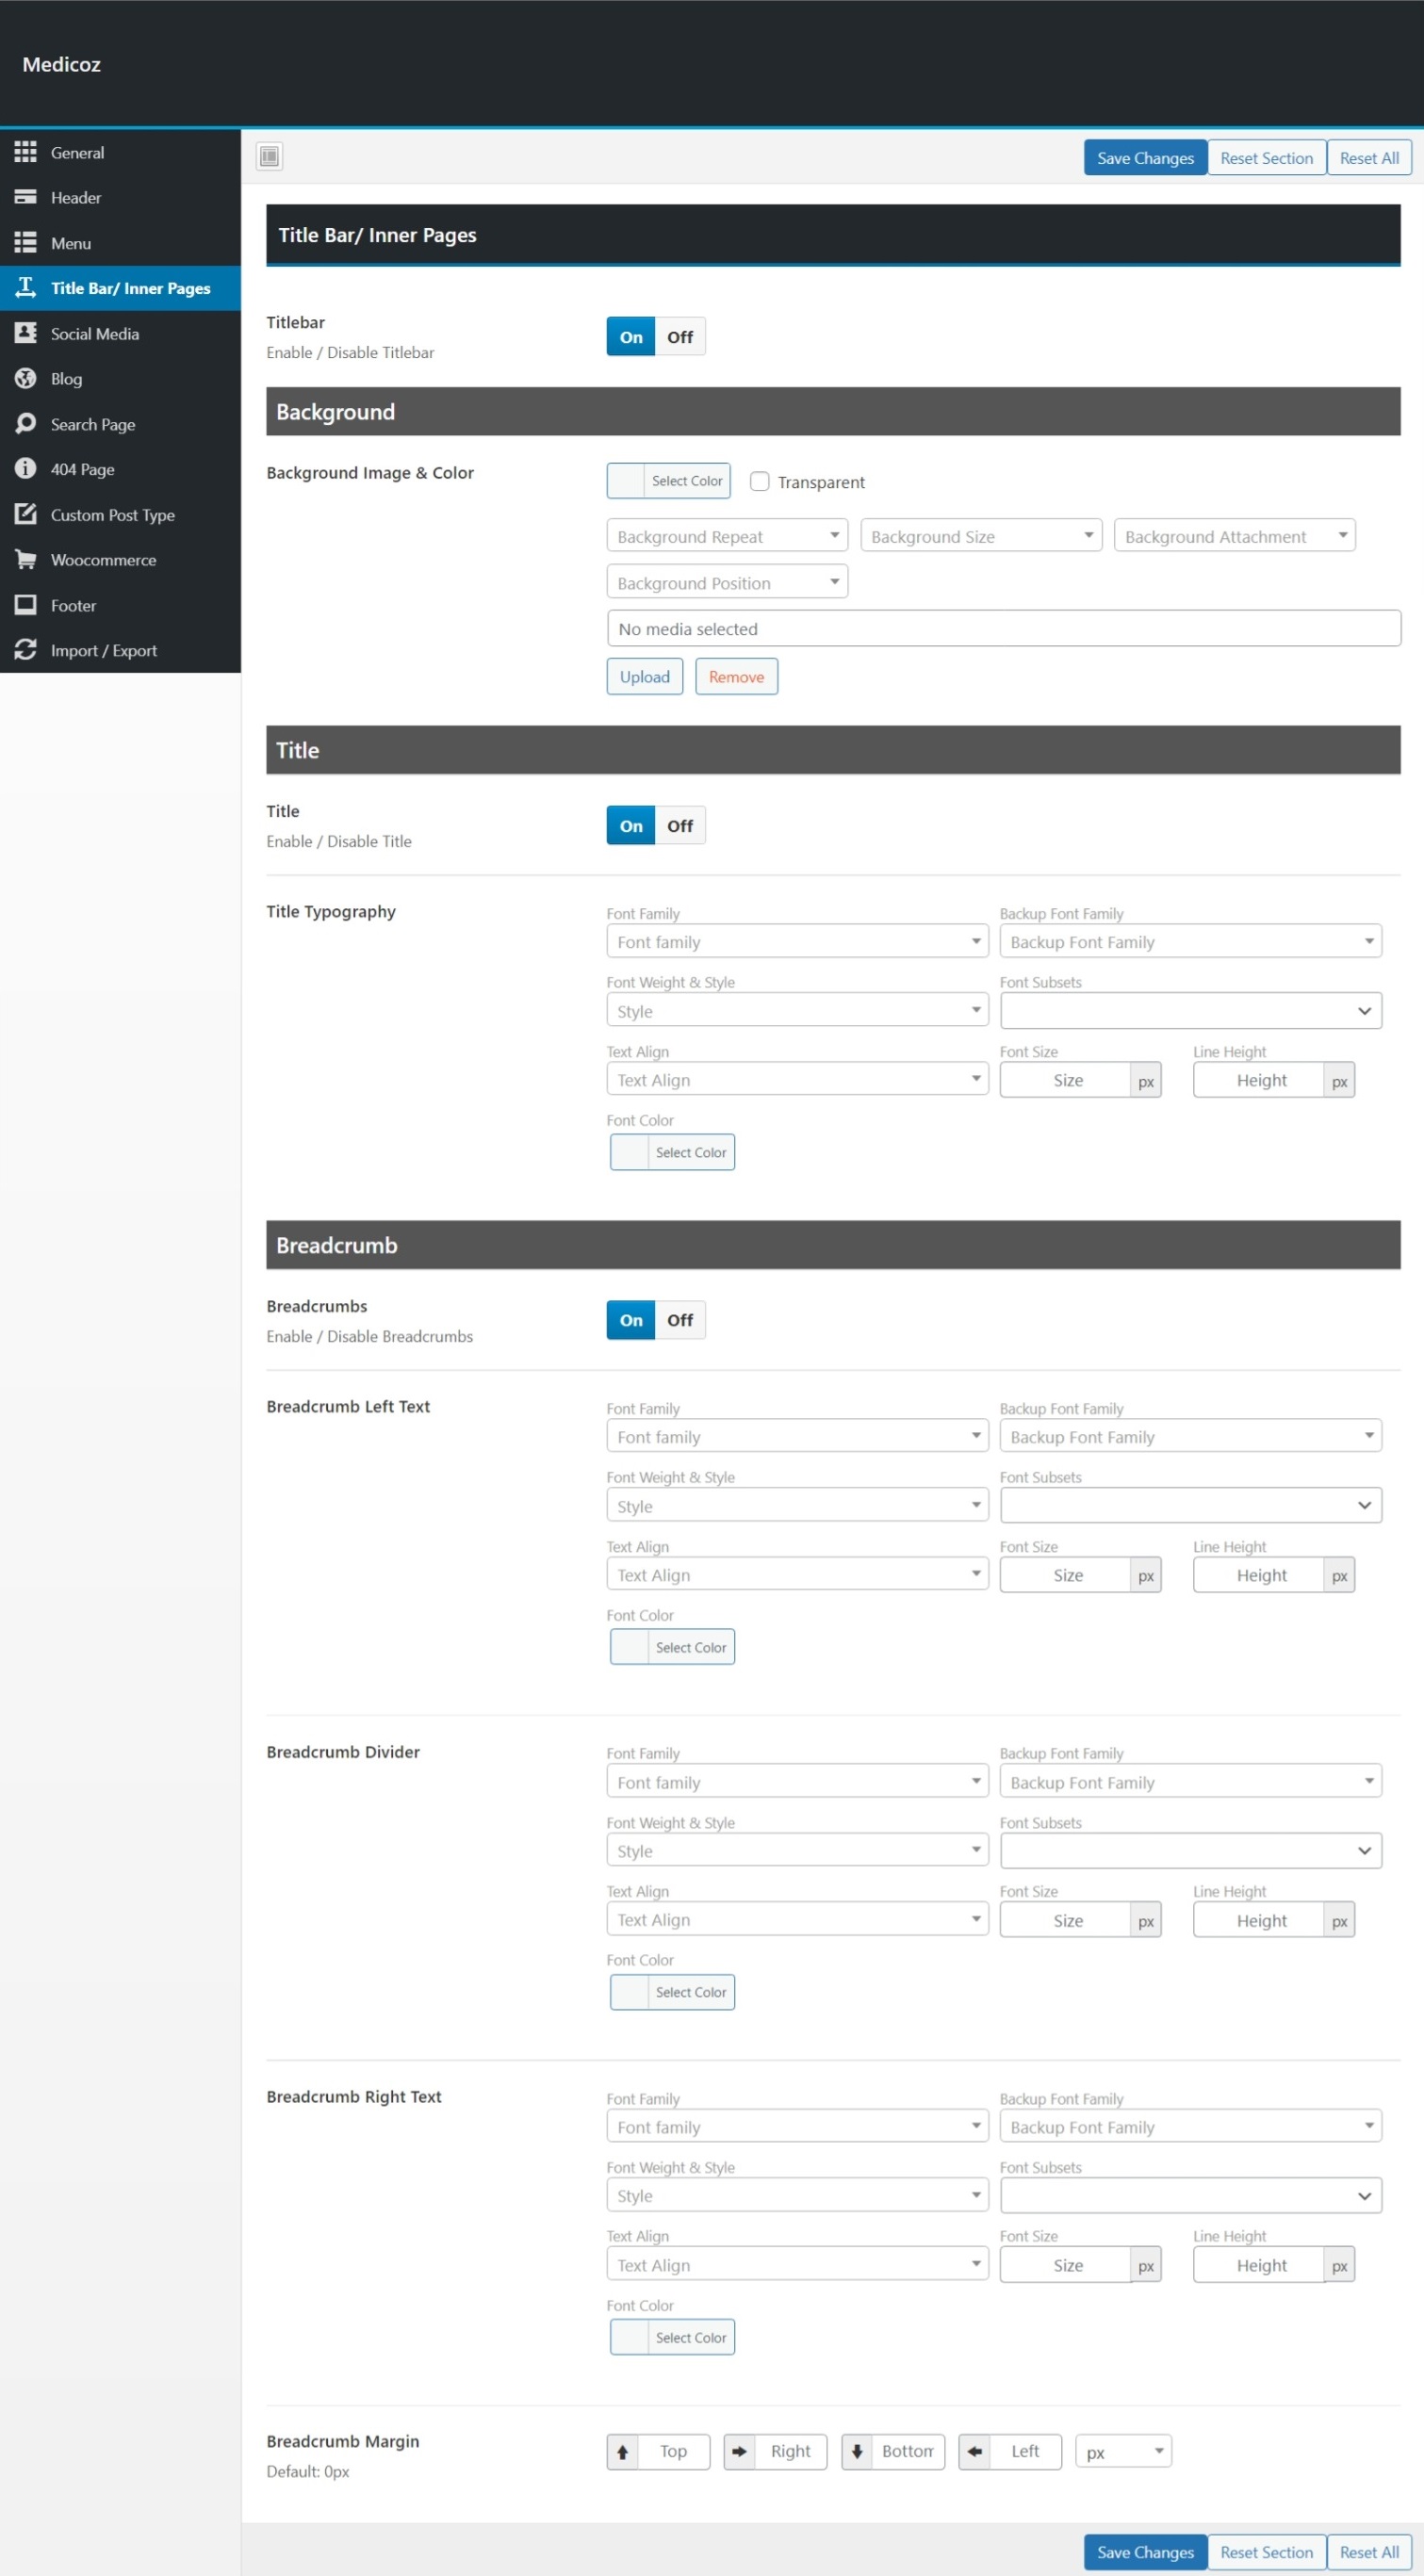
Title Bar-Inner Pages
To change the information of Titlebar
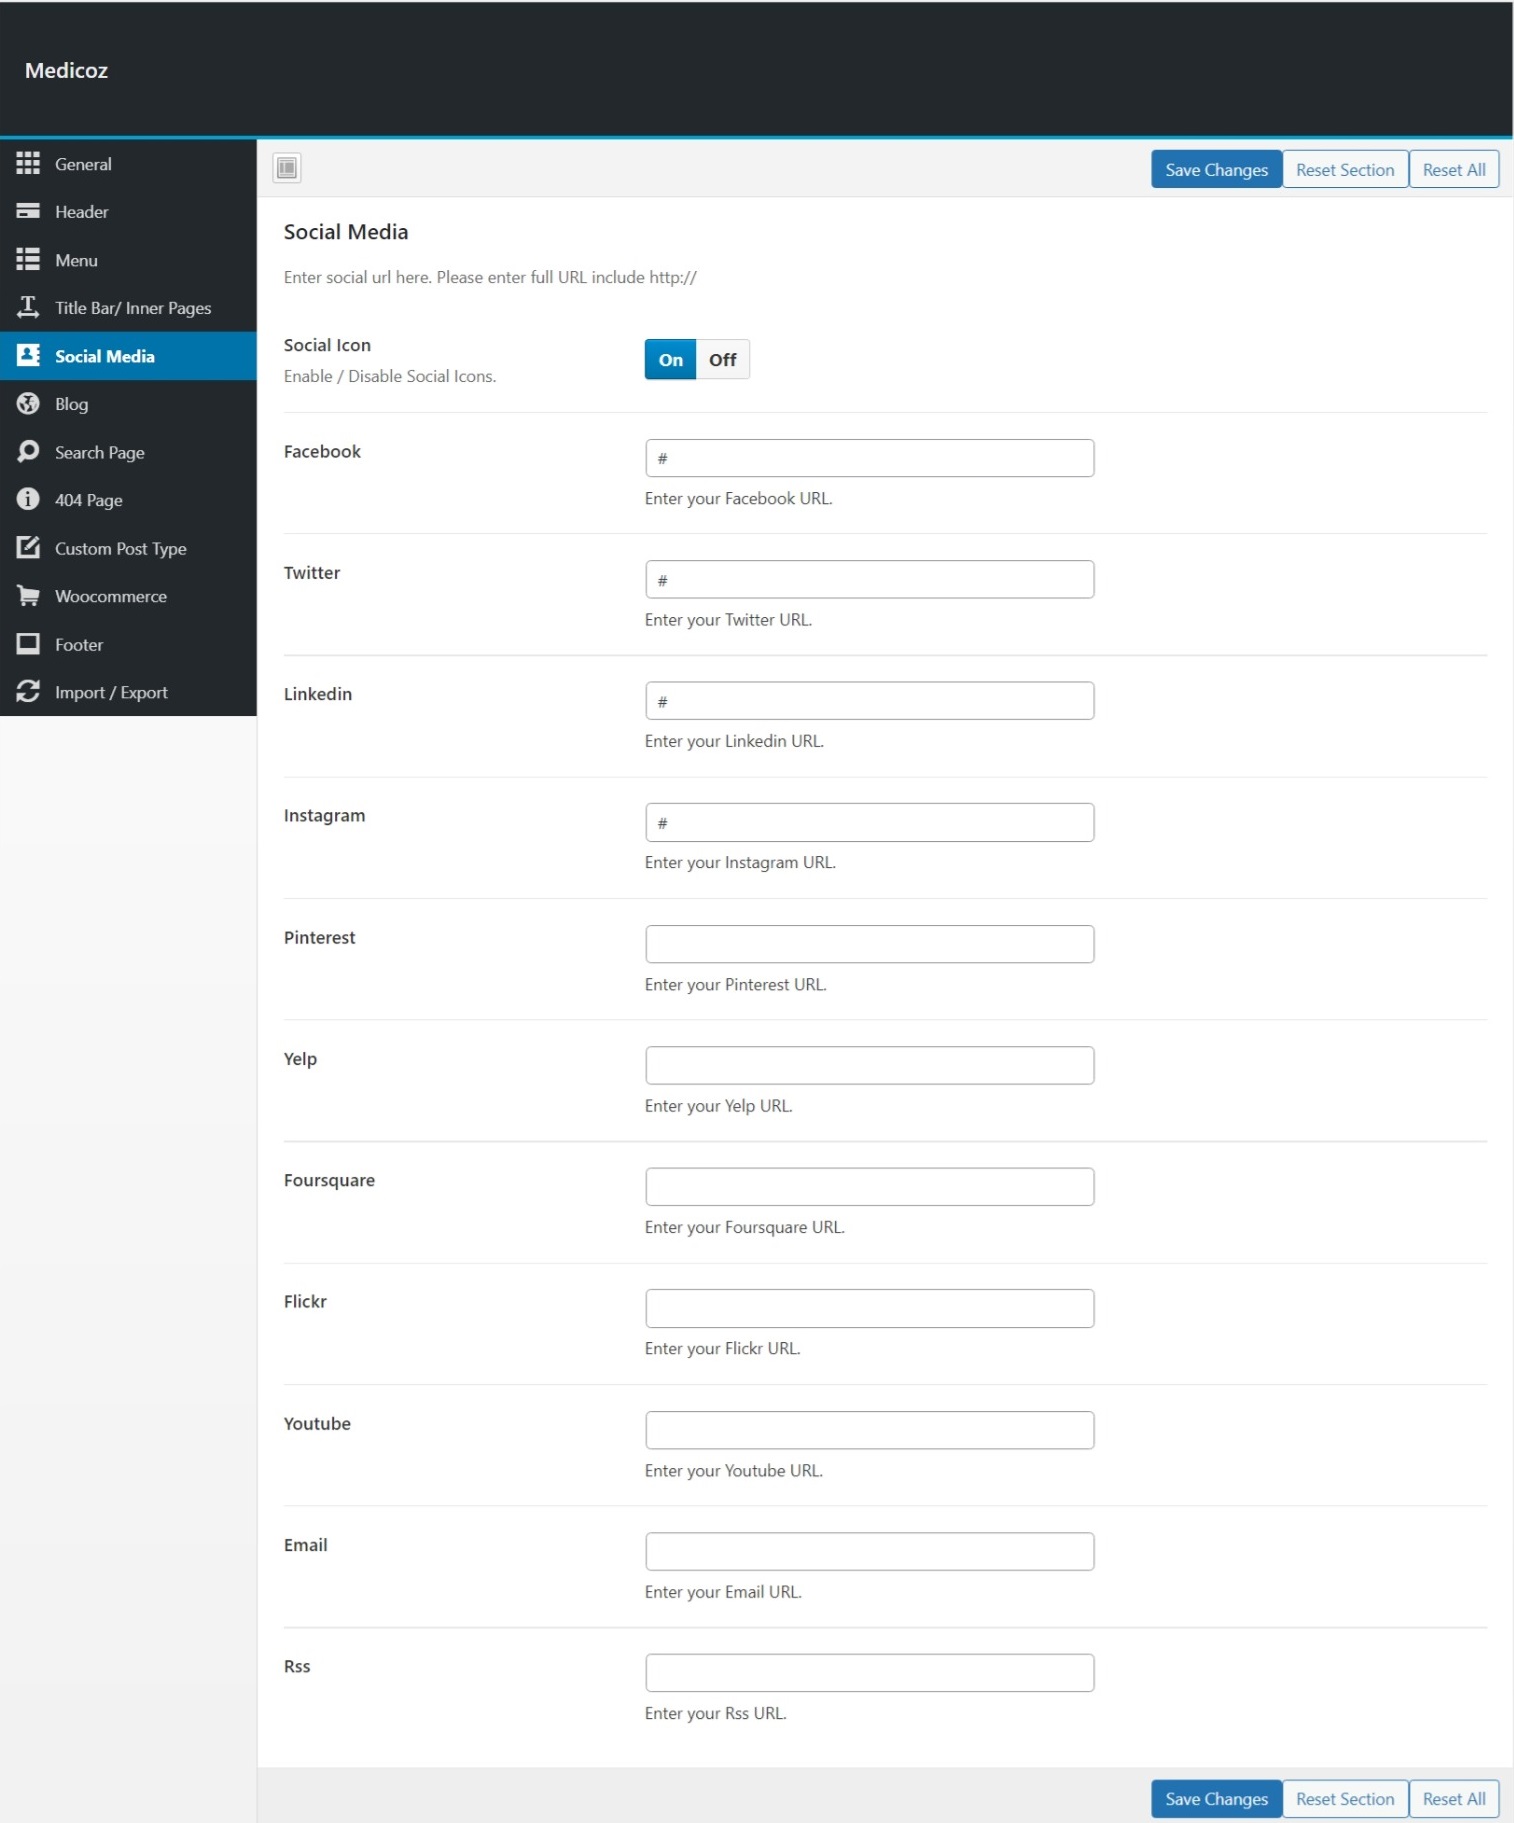
Social Media
In order to display social icons, you will need to:
1. Enter your social profile URL:
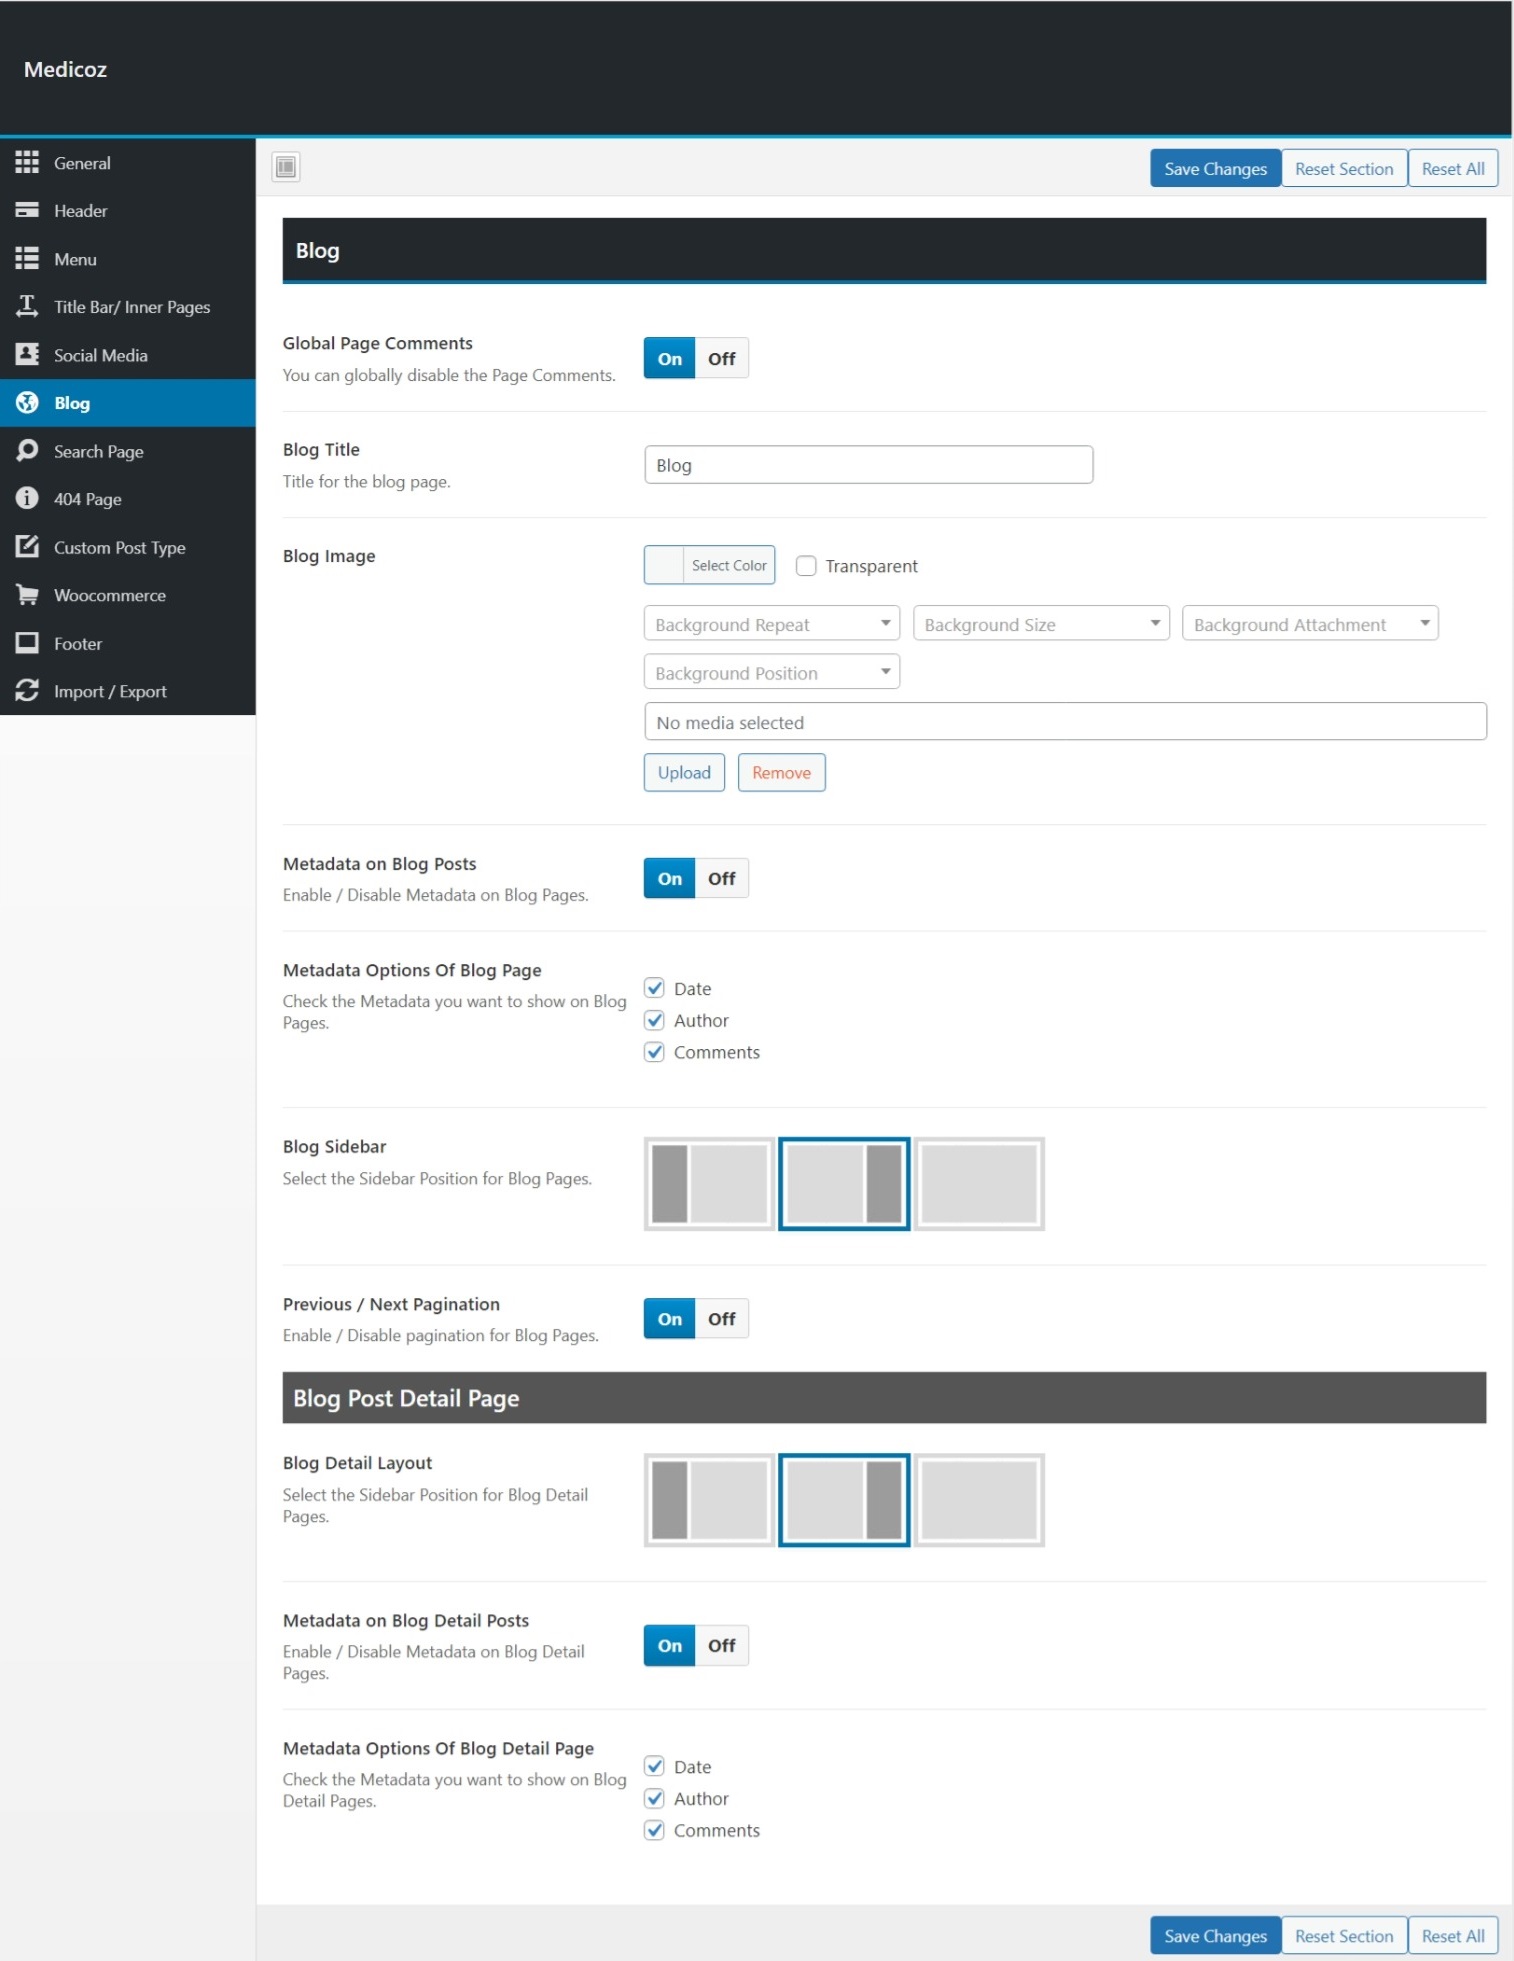
Blog
To change the Blog Settings
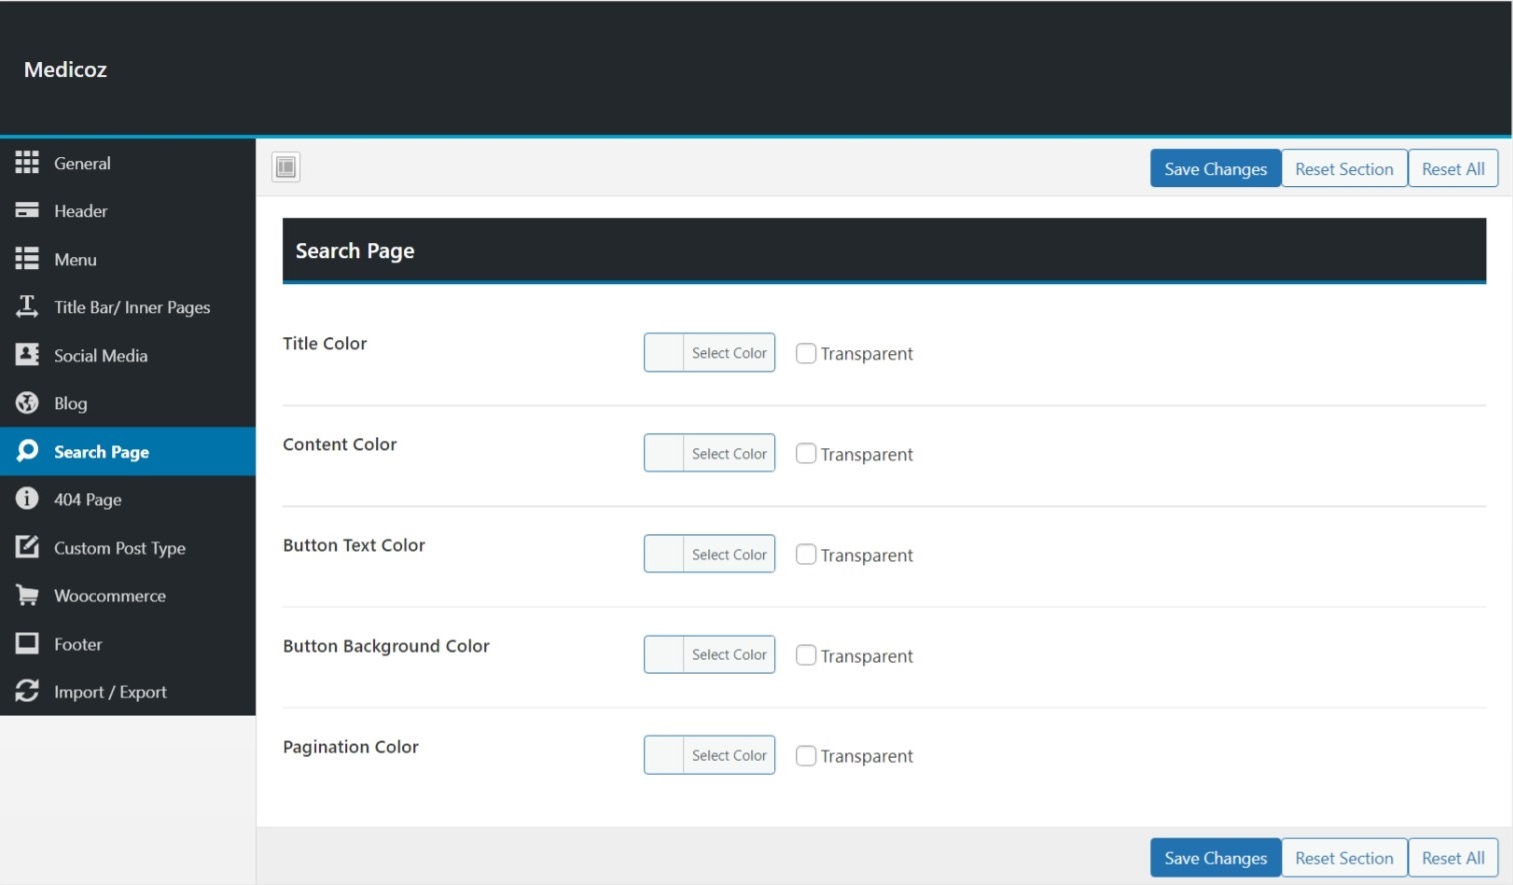
Search Page
To change the Search Page Settings
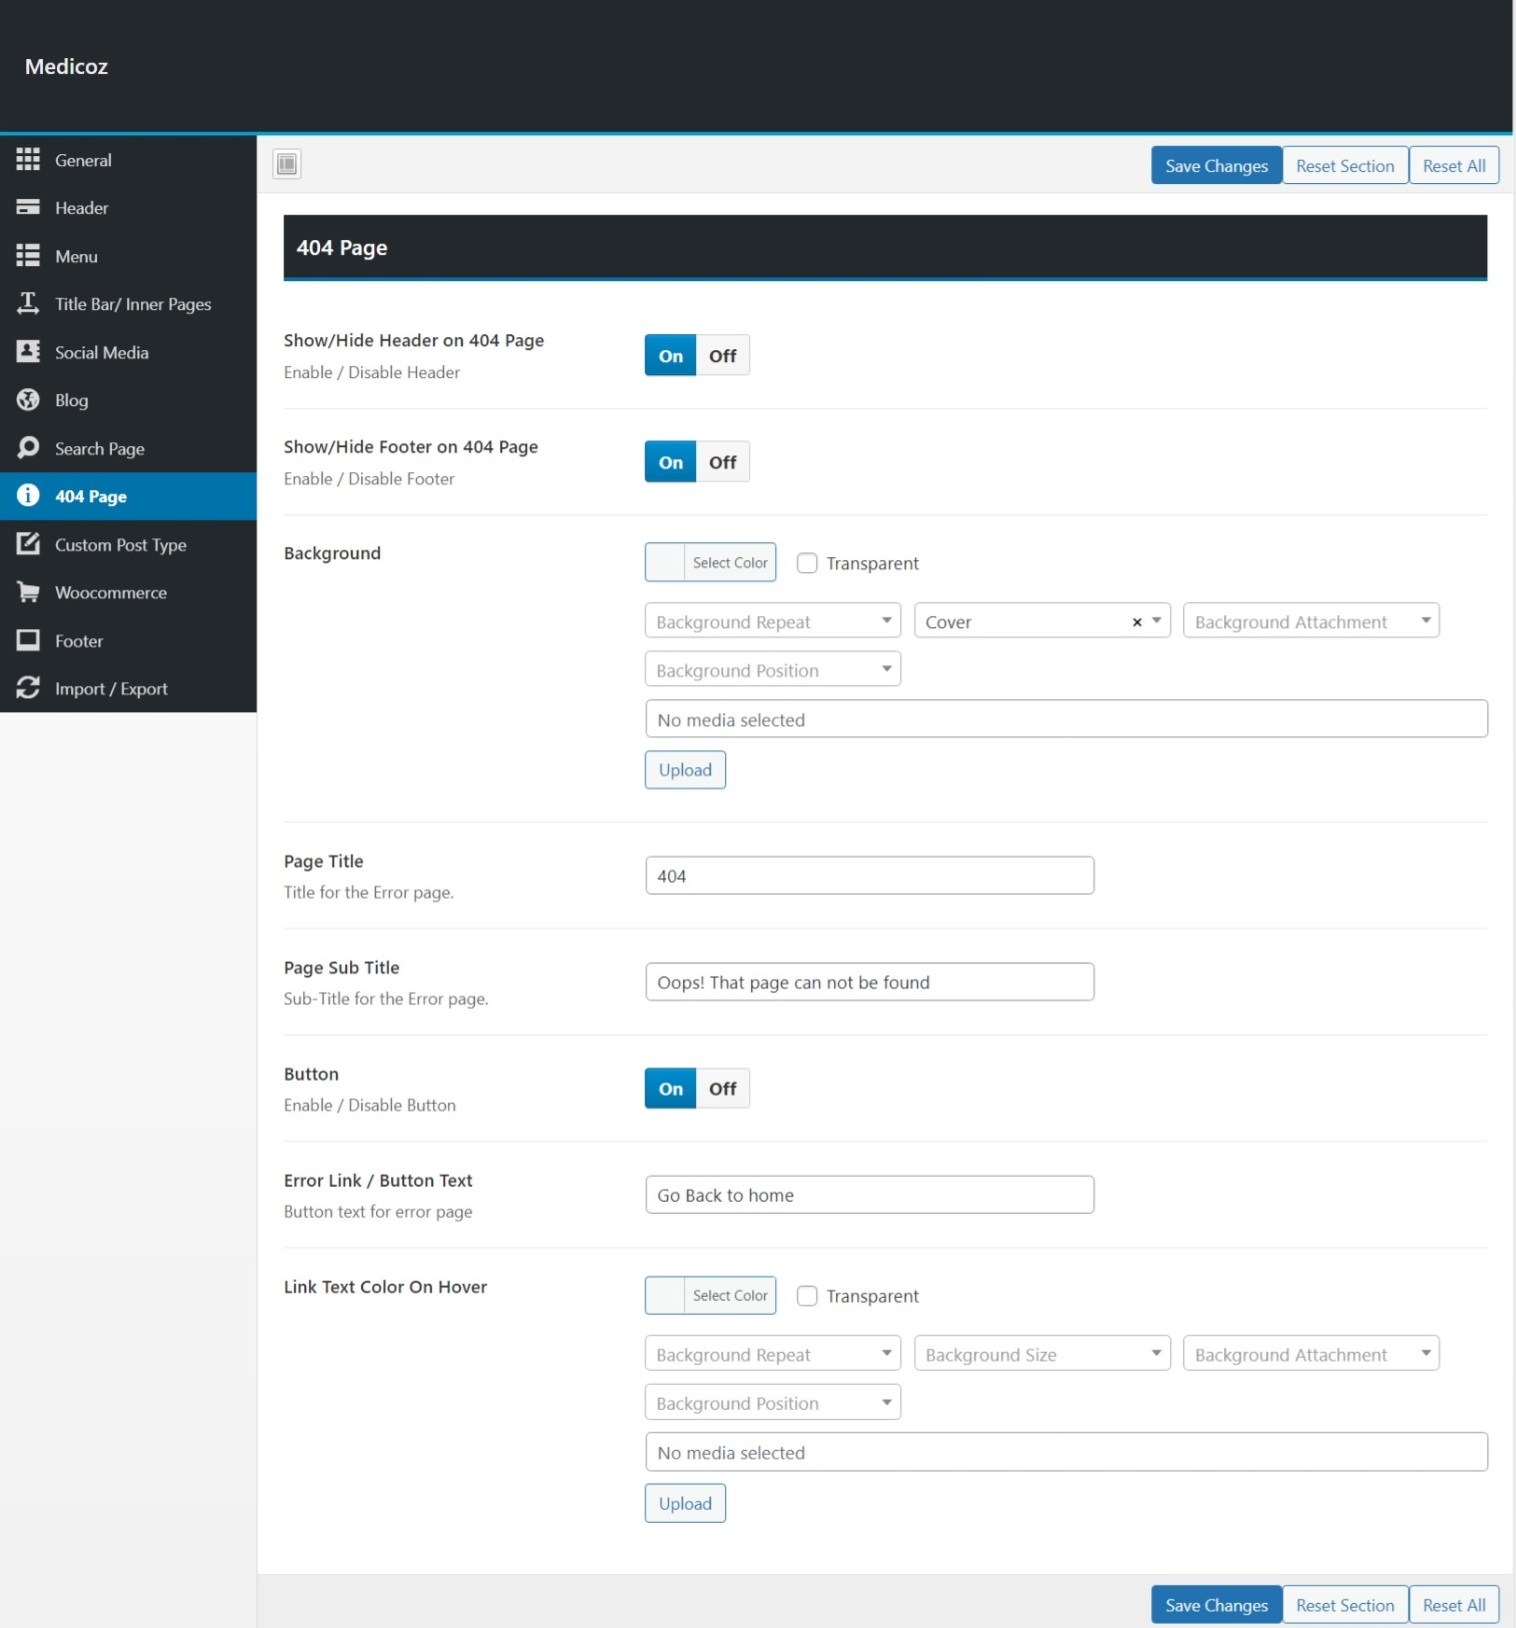
404 Page
To change the 404 Page Settings
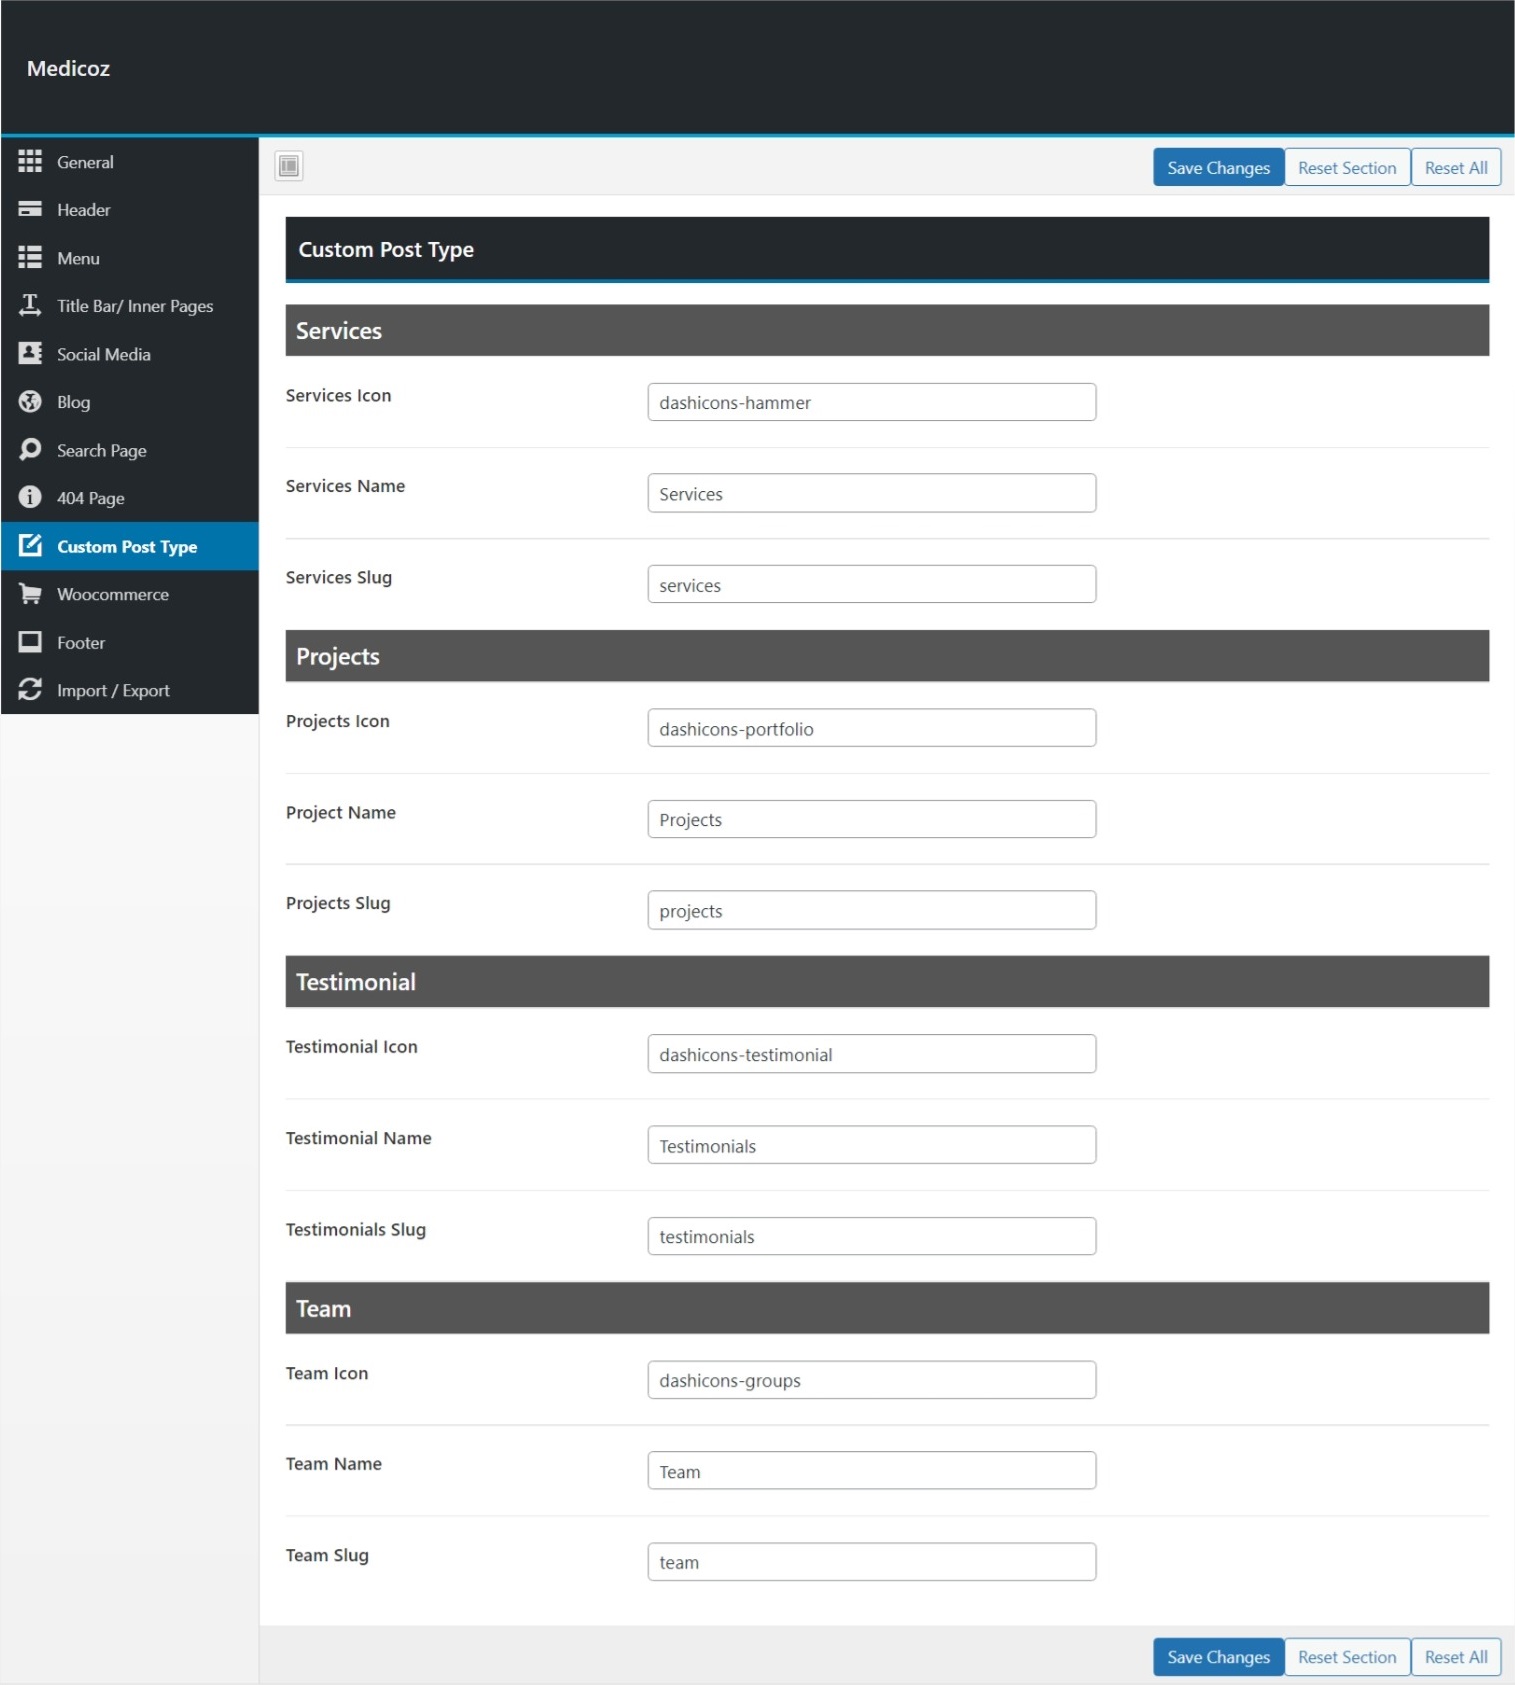
Custom Post Type
To change the Custom Post Type Settings
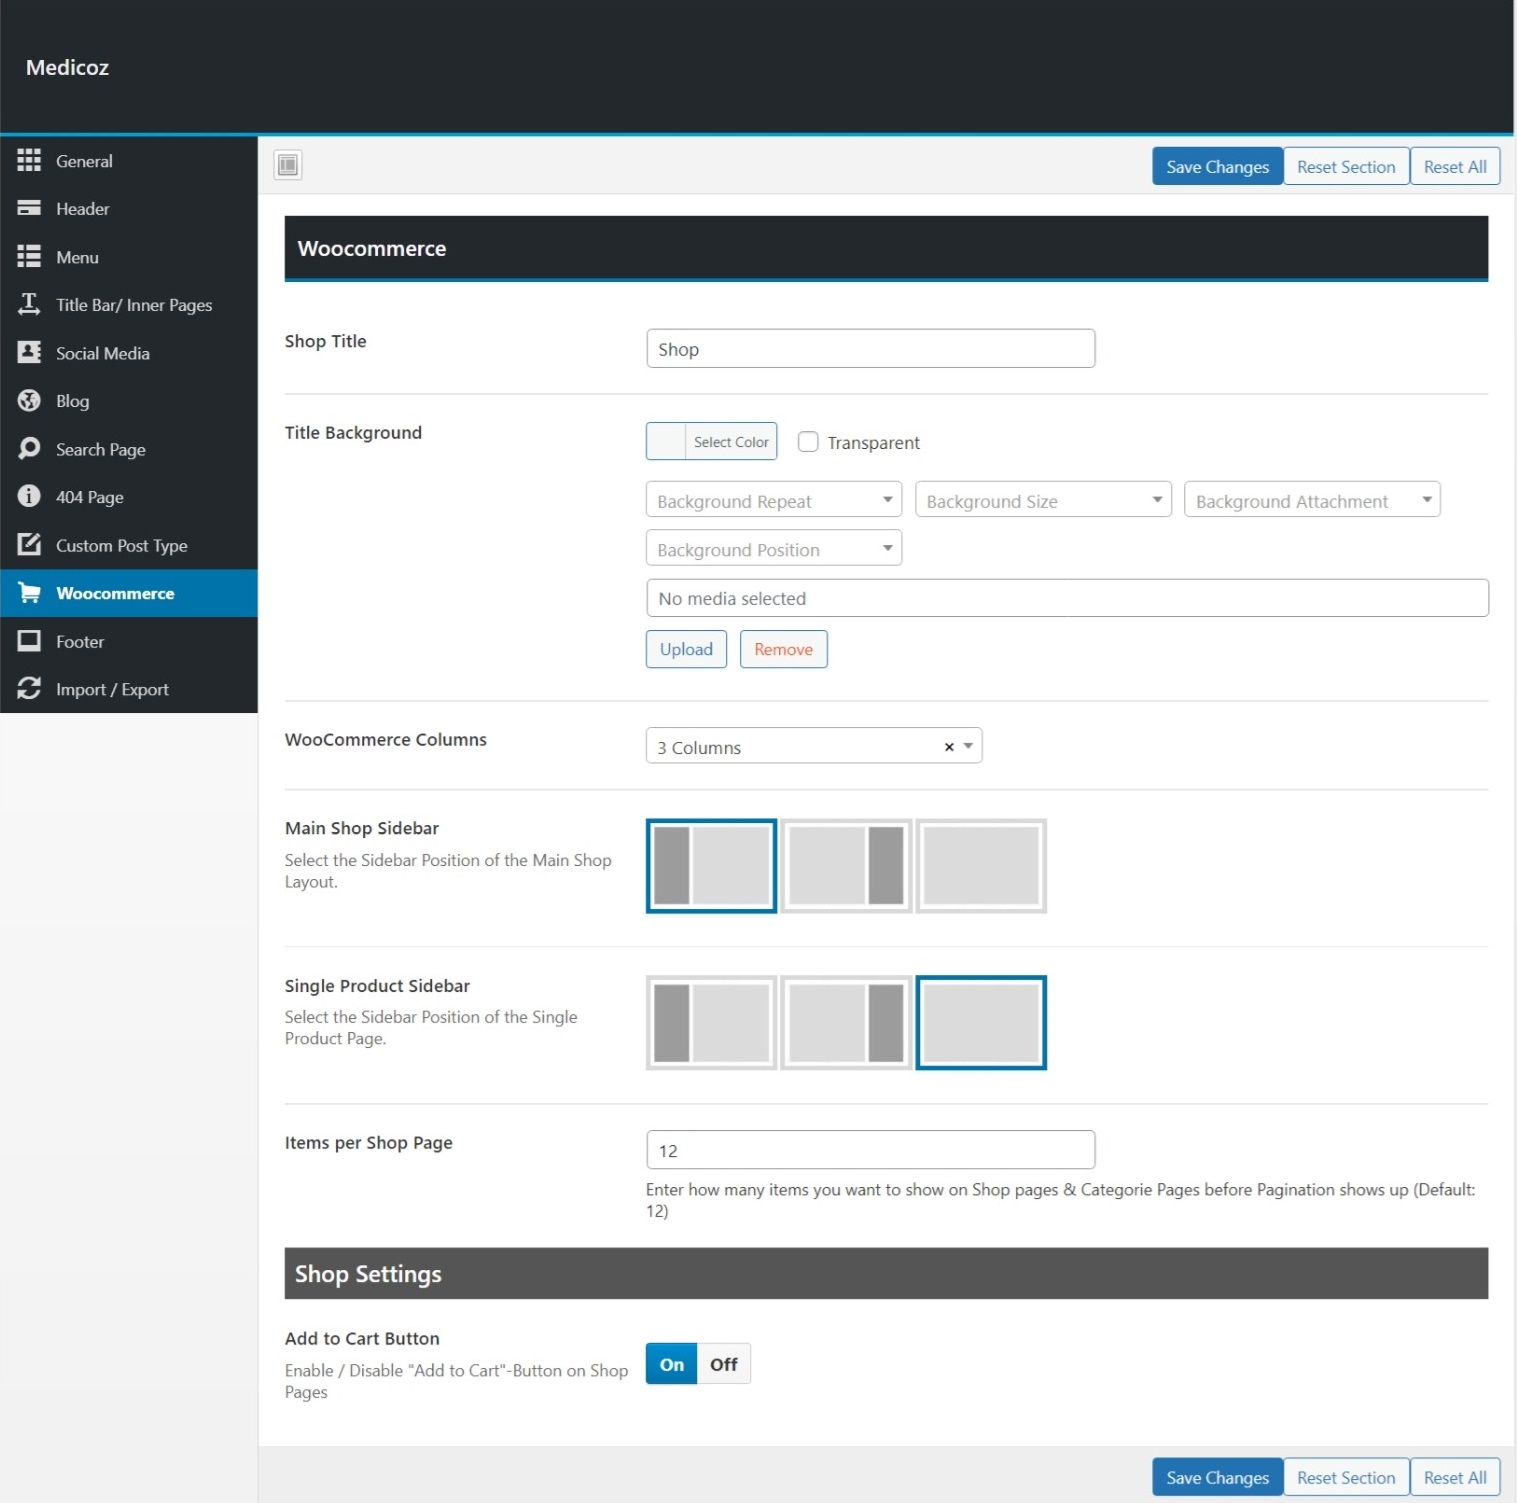
Woocommerce
To change the Woocommerce Settings
Footer
To change the footer Settings

Import Export
To Import / Export the theme option settings

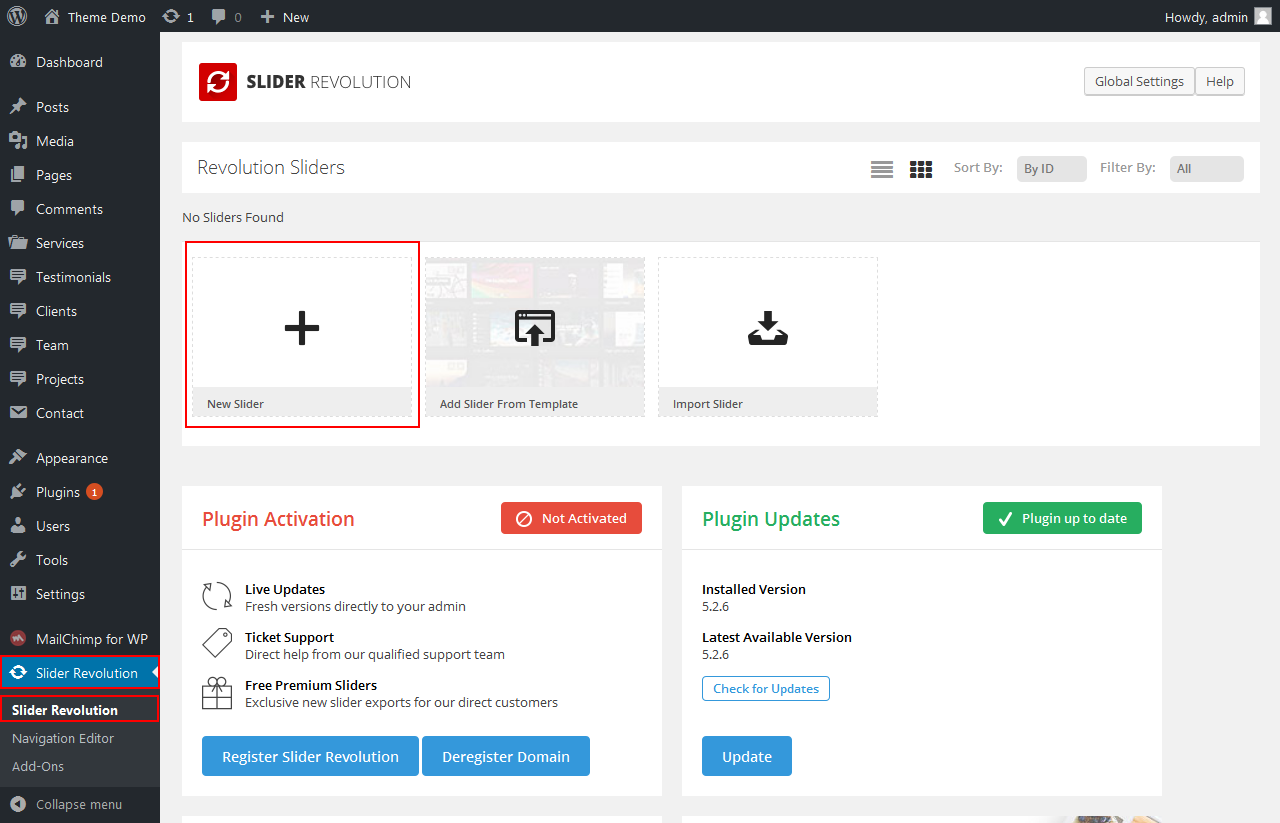
Sliders
This theme come with Revolution Slider premium license, in order to understand how the slider works and how to work with it, I prefer you read it's documentation live at http://revolution.themepunch.com/documentation/
Pages
Setting Up your Front page & Blog Page
tep 1: Go to Settings > Reading and select which page you would like for your font-page and blog page

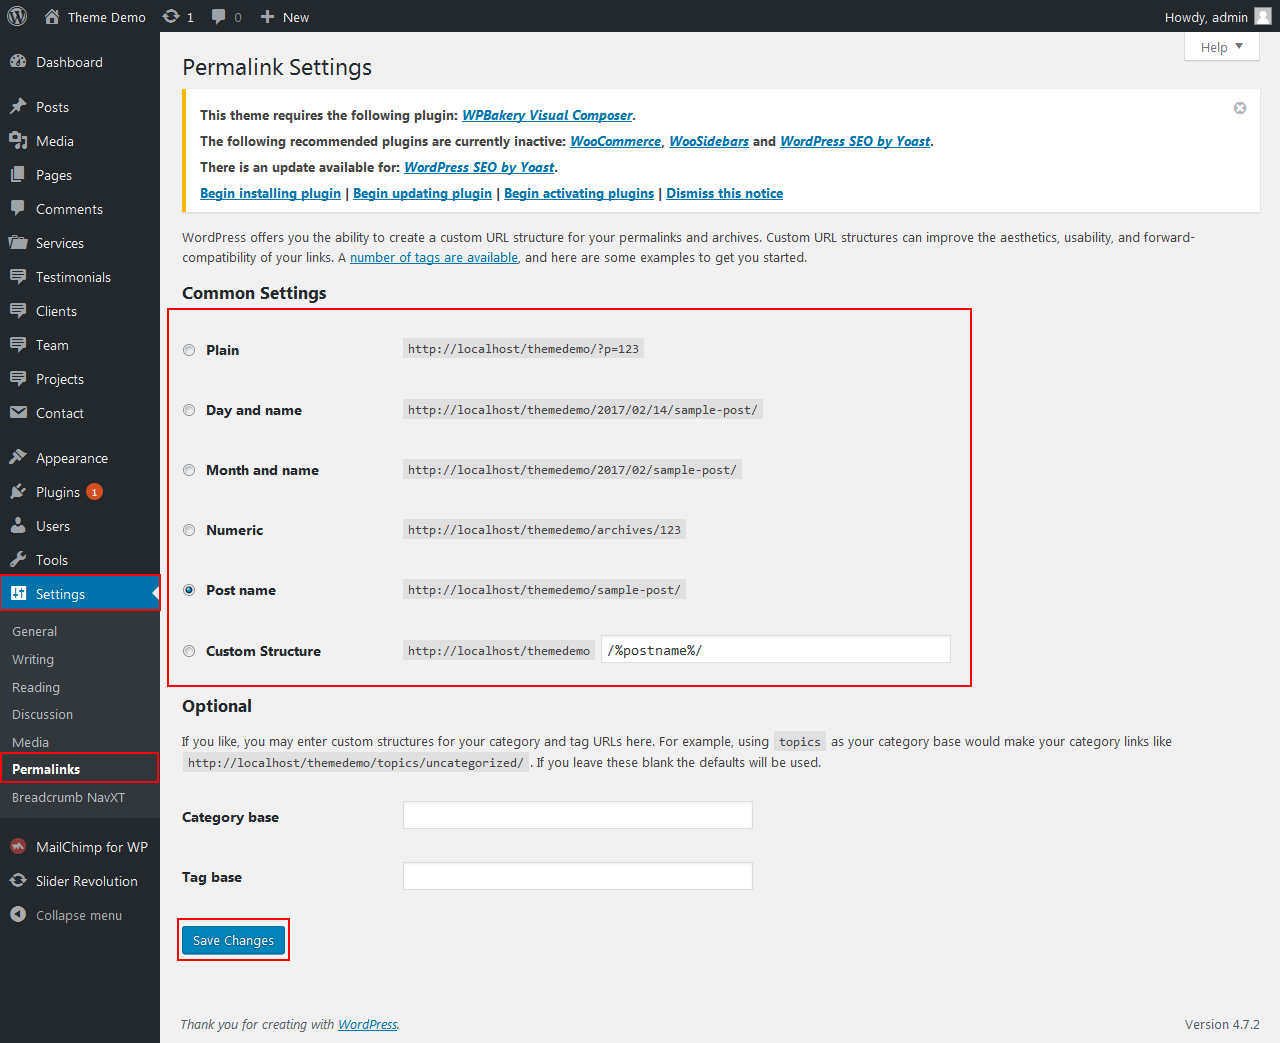
Setting Up your site permalinks
tep 1: Go to Settings > Permalinks and select one from common settings
Update Theme
From here you will be able to update the theme.

For more info visit here: https://www.youtube.com/watch?v=fhRFhXnuP1I
Translate
From here you will be able to translate the theme in your own language.
The theme comes with GetText Catalog file (.PO) which contains all strings that are specific to the theme and won't be translated when changing WordPress language itself. The files reside in /languages folder of the theme. To translate WordPress Find a list of language codes at http://www.wordpress.org in your Language. As an example, the language code for English is en_EN. Translating .PO file allows changing theme specific strings language. In order to translate .PO file follow proceeding instructions: 1. Download and Install POEdit Software from http://www.poedit.net/download.php POEdit is cross-platform gettext catalogs (PO files) editor which provides compact view of data and very effective user interface. 2. Extract the theme and copy the theme files into a new directory. 3. Now open the PoEdit application, and create a new catalog (File » New catalog). 4. From the menu, select Catalog » Settings and fill in all required information. 5. Click on the Paths tab and change the local path from 1st line to your path with theme files and click "OK" then update the catalog (Catalog » Update from sources) to verify that your path to the theme is correct. 6. Now you can start translating the theme by selecting each bold string in the list, and typing translation in editable area at the bottom. 7. After you have completed string translations, save your catalog by using the language code_COUNTRYCODE file naming convention, eg. as fr_FR, and upload the compiled catalog that was generated by PoEdit (eg. fr_FR.mo) to your server, in the theme language directory. 8. Now that you have a compiled translated file you need to instruct Wordpress to use it (if you’ve already installed Wordpress in another language you might have the next step done already). Open the file wp-config at the root of your Wordpress installation and look for the following code: define ('WPLANG', ''); If, per say, in our above example we translated to French then we saved our file as "fr_FR.mo" and need to change this line of code to: define ('WPLANG', fr_FR '); If everything is done correctly, you should now see the frontend of your site in translated strings. Important: Do not translate php values, such as %s, %2$s etc. Always include them in the translated string!